 |
924Board.org
Discussion Forum of 924.org
|
| View previous topic :: View next topic |
| Author |
Message |
Sensei Grant
Joined: 17 Apr 2016
Posts: 11
Location: Tuscaloosa, AL
|
 Posted: Fri Jun 10, 2016 1:00 am Post subject: My Alternator upgrade Part 1 (Long Post) Posted: Fri Jun 10, 2016 1:00 am Post subject: My Alternator upgrade Part 1 (Long Post) |
 |
|
As the proud new owner of a 1977 924, I was driving it home only to note that I was having charging issues so I started the process of elimination to find the problem.
Fix 1 Tighten the battery connections. The negative cable was so loose that it came off the battery when removing the jumper cables used to get the car to start. (I had to stop to address the fact that the rear hatch was popping open while driving down the interstate and had to turn the car off. Because the emergency brake didn't work, I was using the transmission to keep the car in place as I got out to remove the hatch struts only to get in back into the car and it not crank due to the battery being too weak) This fix seemed to do the job as 30 minutes of driving later the battery was strong enough to crank the car. Success and an easy fix, I fully charged the battery and all was good (not).
Fix 2 Tighten the belt. After a couple of days I could tell the battery was not charging enough. Quick check and I could see the problem, the belt was loose. I found that the belt was loose because the bottom bolt was missing. Dropped the shield, actual found the bolt on the shield, and made the mistake of thinking it would be an easy fix. I got a new lock nut to fit the bolt and started to reassemble only to find the lower bracket was a jumble of parts that the PO had put together to accommodate for the broken tension bracket. Then I discovered that this problem is common and that there was no readily available source for a new bracket. Purchased a new belt and was able to to use the broken bracket as it was just long enough to tighten the new belt. I also acquired a 931 mounting bracket from eBay with the hopes of scavenging parts or possibly relocating the alternator. Fix worked (not) and I started seriously looking for a replacement bracket.
Fix 3 Fabricate new bracket. Again I had a couple of days that it all seemed to work then it stopped charging again. And again, the belt was loose. It was working just enough that I was able to drive the car (had to make an emergency trip) 3 hours and 150 miles parked the car for a few hours and was able to crank it up and drive back home without having to jump start it using the extra battery I had brought for that purpose. Also the car had other issues. Not only was the battery not charging but the car also wanted to overheat if it was not moving. As long as I was rolling along, the temp gauge was at or below the 1/2 mark, but if I stopped the temp would rise up into the red zone until I could get moving again, so I had to time the traffic signals so as not to sit at a traffic light for an extended length of time. On my trip back I took the interstate to avoid stopping and the temp held right at the 1/2 mark. Also the output from the cigarette lighter was not enough to charge my phone and the gauges were bouncing. My initial thought was that the alternator was bad and as its pulley was too hot to touch (water pump pulley was warm and crank pulley was relatively cool) I thought the heat had caused the belt to stretch. However when I started to take it apart I found that the bracket had broken again and the belt was still tight if I aligned the broken pieces. I went to Lowe's, bought a piece of flat steel, and fabricated a new bracket. With my homemade bracket, the belt was nice and tight but I still had an issue. I could tell that the battery was not being properly charged and the other issues (Still not able to charge my phone, gauges still bouncing and car still overheating when at a stop) remained as well. In addition, power from the cigarette lighter also became unstable and when I was accelerating (which should have been maximum alternator output) my radio powered off. I knew that the extra issues could be unrelated to the alternator (I know grounding issues are common) but I was trying to solve one problem at a time and getting the battery to charge was top priority and if it fixed other issues all the better. I decided to replace the alternator.
_________________
Always be yourself, unless you can be Cthulhu, then always be Cthulhu. |
|
| Back to top |
|
 |
Sensei Grant
Joined: 17 Apr 2016
Posts: 11
Location: Tuscaloosa, AL
|
| Posted: Fri Jun 10, 2016 2:12 am Post subject: Part 2 Alternator replacement |
|
|
As the car is my daily driver and was still usable for short trips around town I decided not to take it apart until I had the parts needed to put it back together. There was no local source for an alternator so I ordered one online from a large chain with a local store that is walking distance (about 200 yards) from my house. For simplicity I choose to get an exact replacement so there would be no fitment issues. My plan was to be able to do the swap and not be without my car for an extended length of time. The only affordable choice was a remanufactured alternator (I have not had good luck over the years with chain store remanufactored alternators, never any issues with units form alternator shops) so that is what I got. It is the 75 amp Bosch unit. When the replacement arrive, I took out the old unit. Then I took both alternators to the local store. Of course, the old one failed the bench test so we moved the necessary hardware over to the new one and then I had them test it. Unfortunately, it also failed the test. They gladly refunded my purchase cost and I started looking at other options. I considered going with an alternative such as the 90 amp Audi alternator that is supposed to work, but again I could only find it as remanufactured. I like the drop in that Ideola has but my current budget is a bit tight so I thought about a GM style conversion. For less than the price of a remanufactured 90 amp, I purchased a new Si10 style Tuff Stuff 140 amp alternator capable of 1 or 3 wire setup. New alternator cost $125.00 (shipping was free).
I'll cover the details of the installation in another post, but so you know, it is in and if works great so far. Interestingly enough the over heating issue seems to have been resolved as well. I took pictures as I went so I will include those in the post about my install.
_________________
Always be yourself, unless you can be Cthulhu, then always be Cthulhu.
Last edited by Sensei Grant on Sat Jun 11, 2016 2:42 am; edited 1 time in total |
|
| Back to top |
|
|
Sensei Grant
Joined: 17 Apr 2016
Posts: 11
Location: Tuscaloosa, AL
|
| Posted: Fri Jun 10, 2016 6:57 am Post subject: Part 3 Tuff Stuff Install upper bracket with pics |
|
|
As I said in the last post I chose a Tuff Stuff alternator model number is 7127K. I had a bit of work to fit it to the car but not that much more than I would have had with any alternator as I was going to rework the entire lower bracket anyway. The one I had was still a bunch of junk pieces put together. So here is what I did.
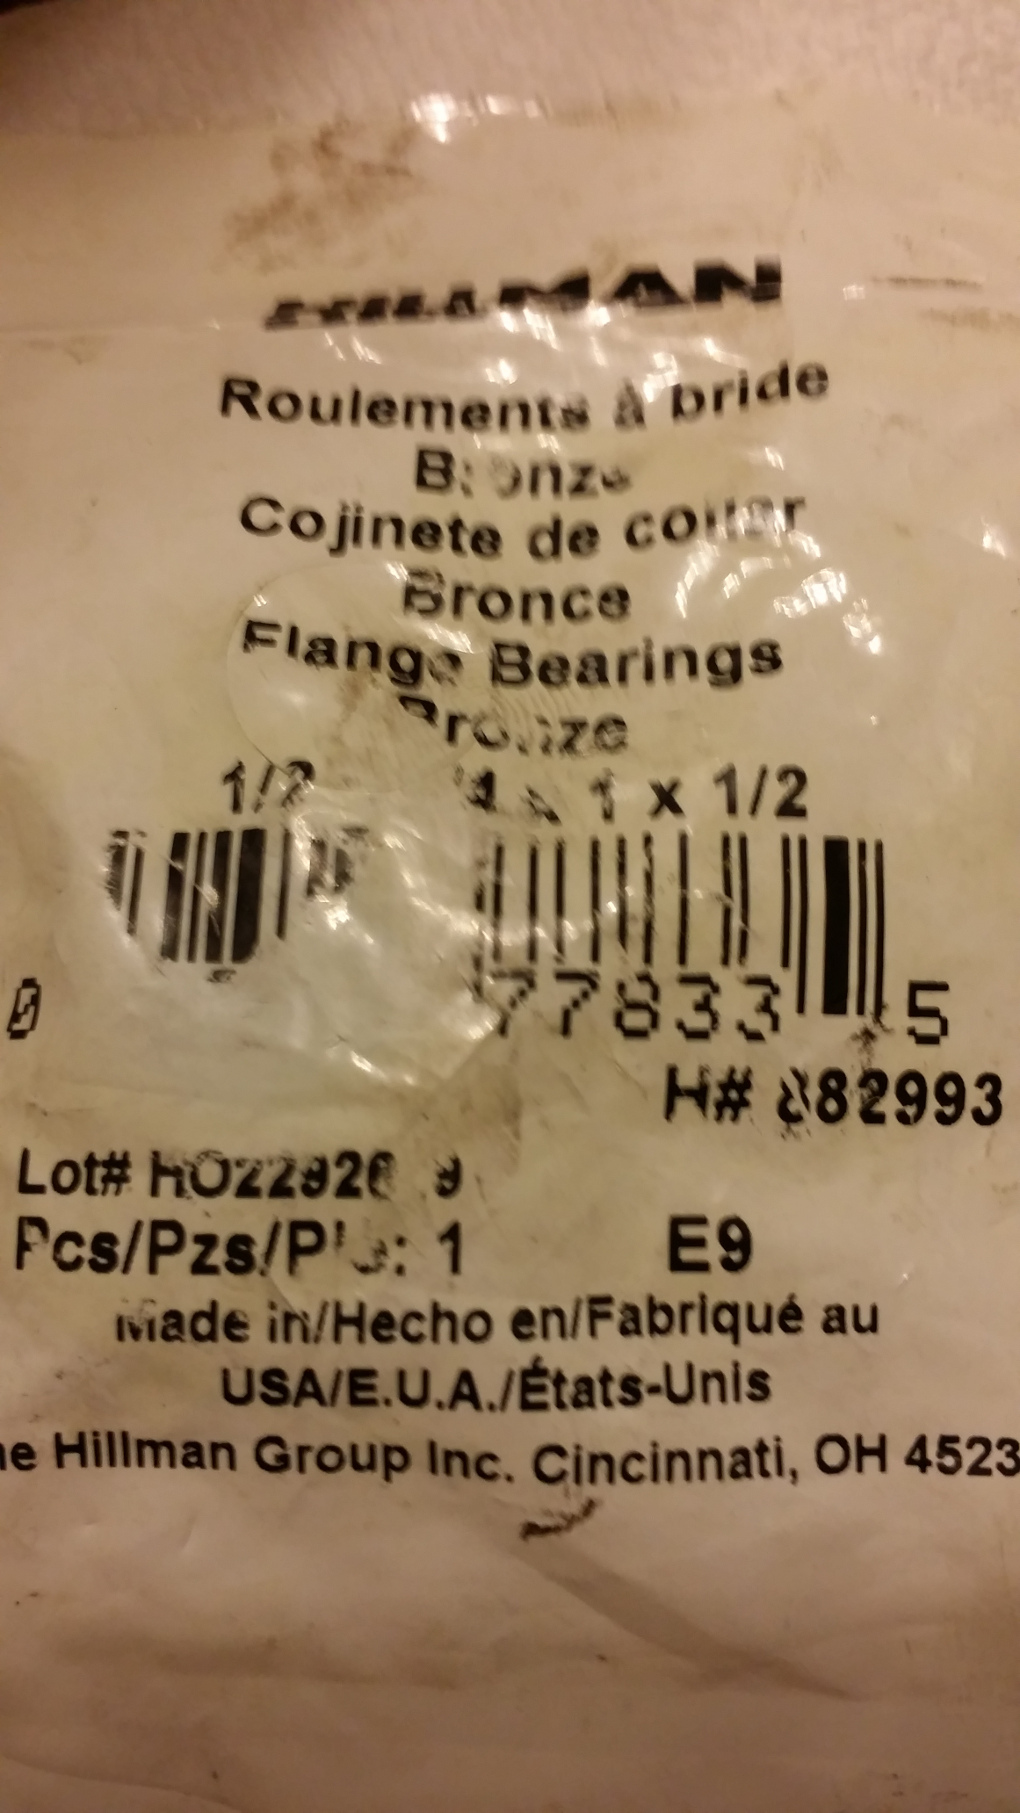
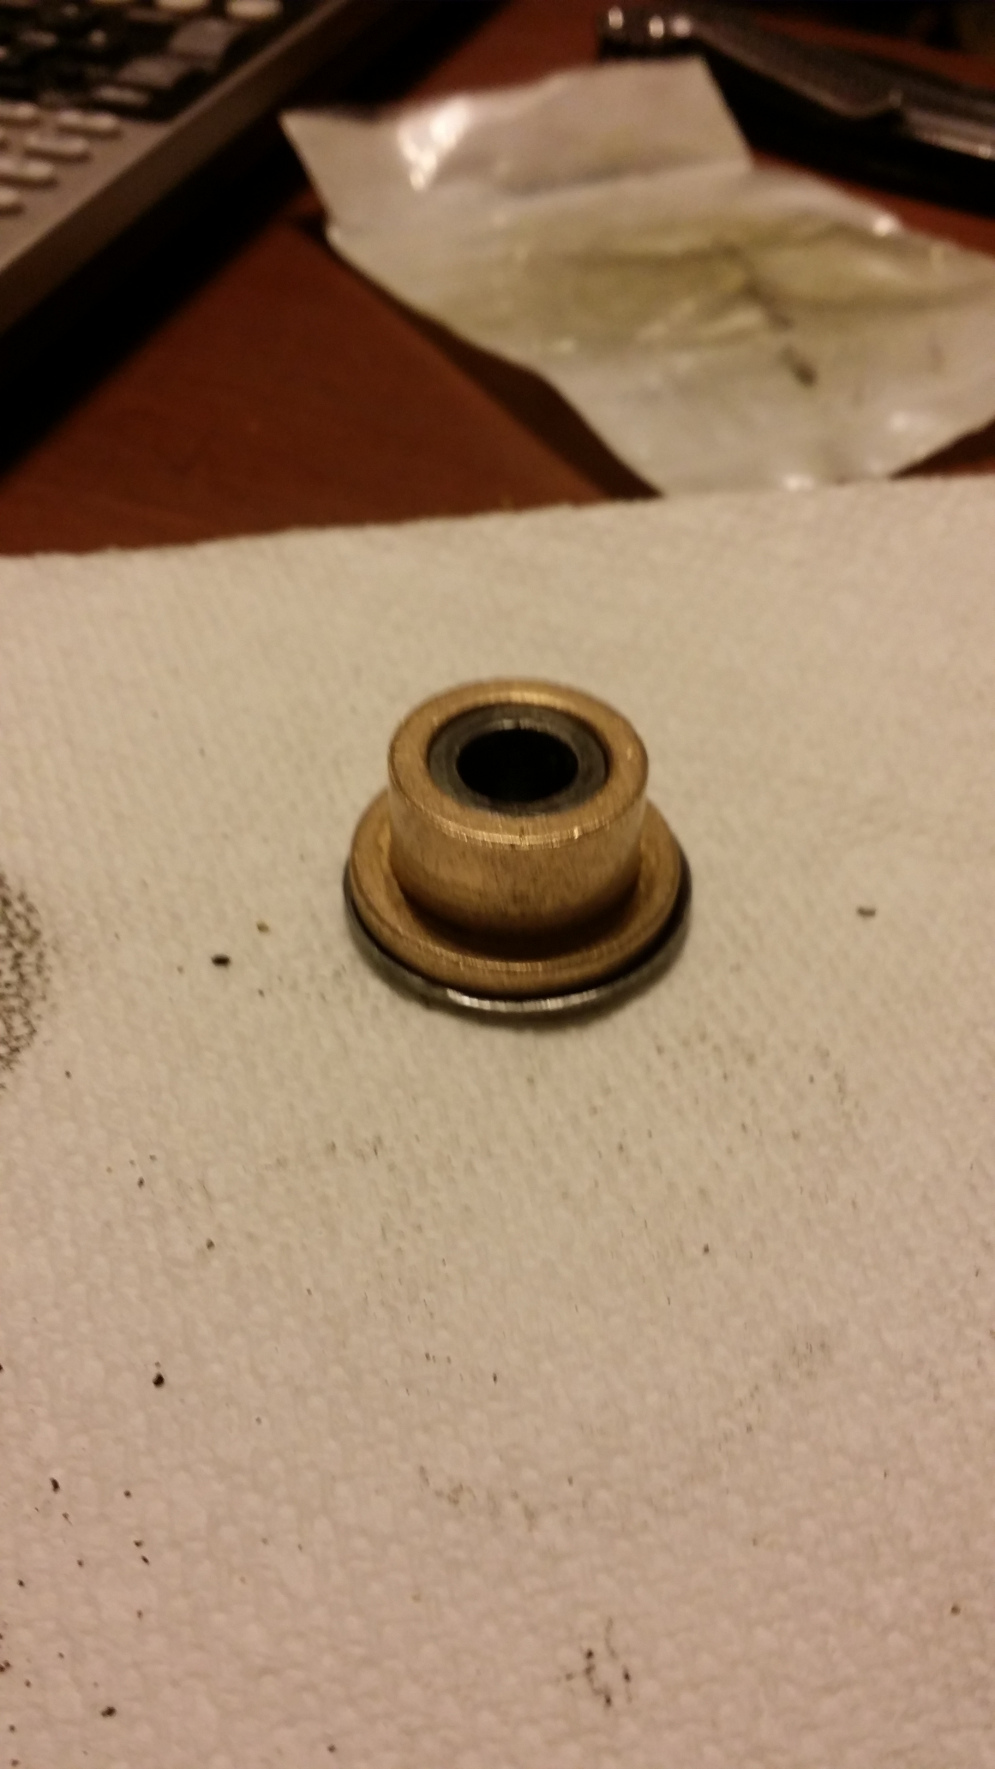
1 I needed were replacement bushings for the top mount as the rubber ones were gone. As a result the alternator was wobbling in the upper bracket. I read that the rubber ones wear too quickly so I wanted a better solution and had seen someone mention using a metal equivalent they found but no details were given. As I had a rubber one out of the 931 bracket I was able to compare it to what I could find at my local Lowe's. I got 2 bronze shoulder bushings. I got the closest thing I could find which were these:
Out of the package they look like this:
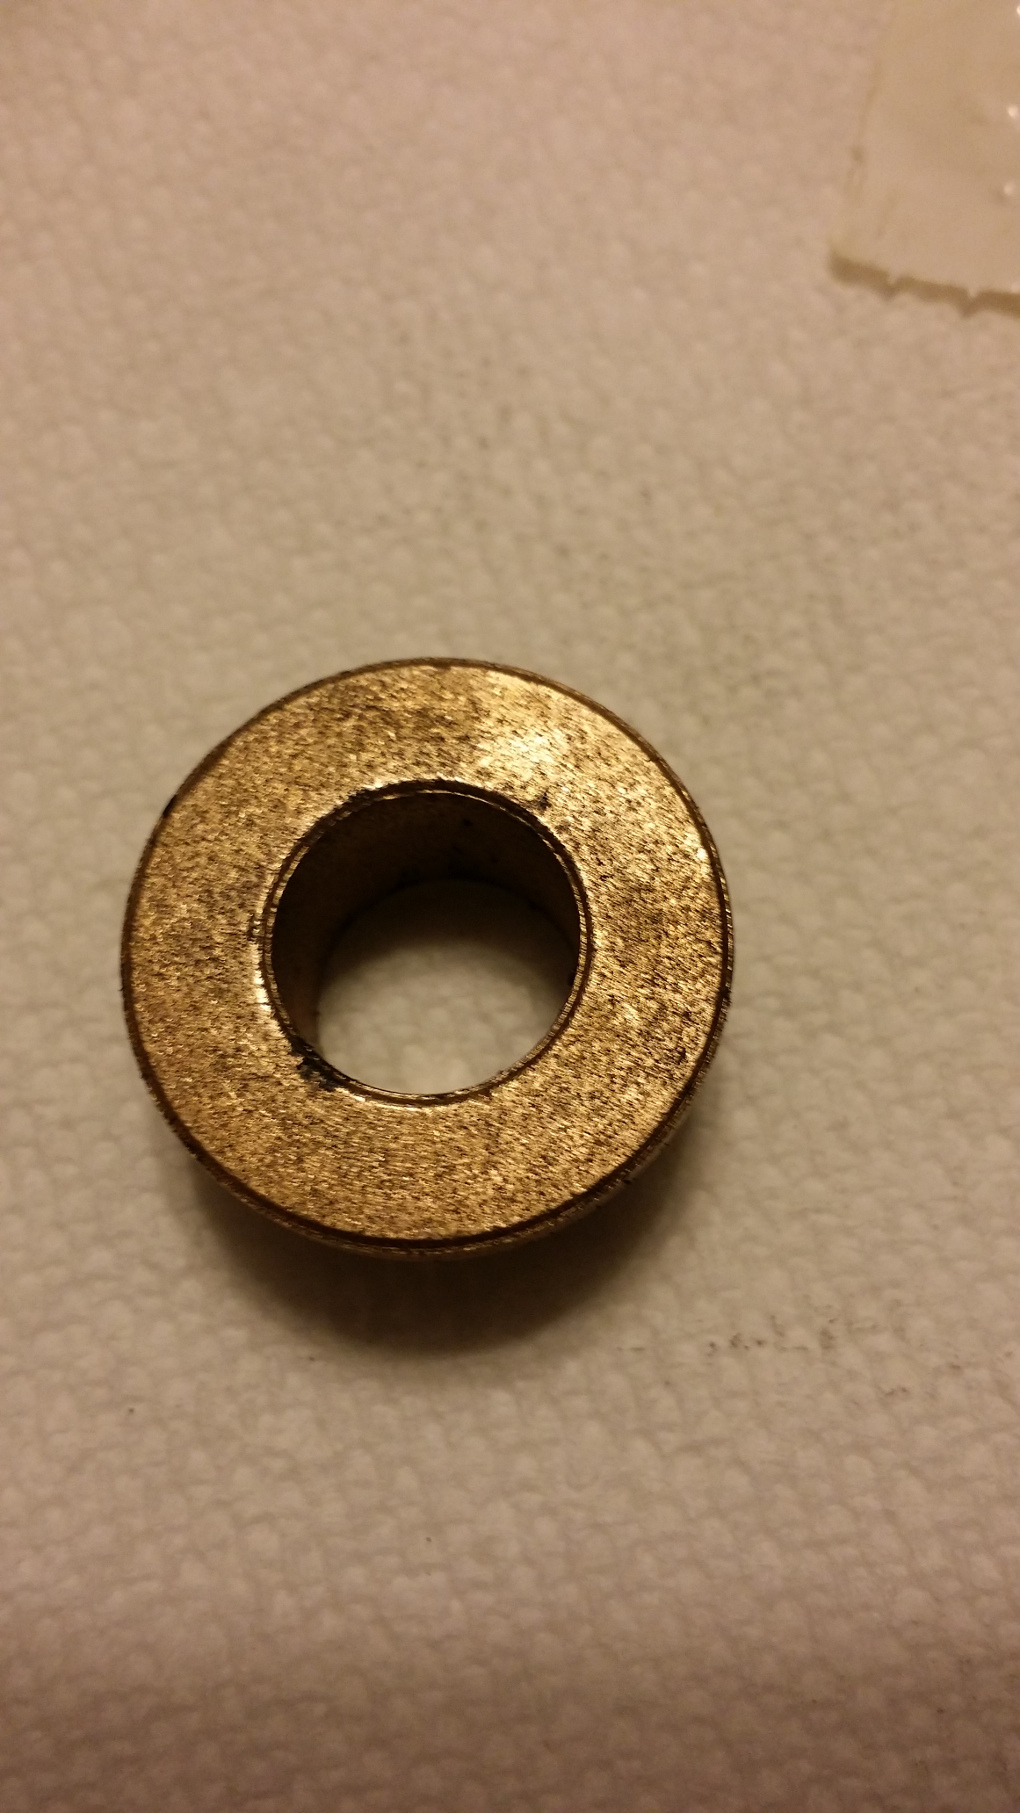
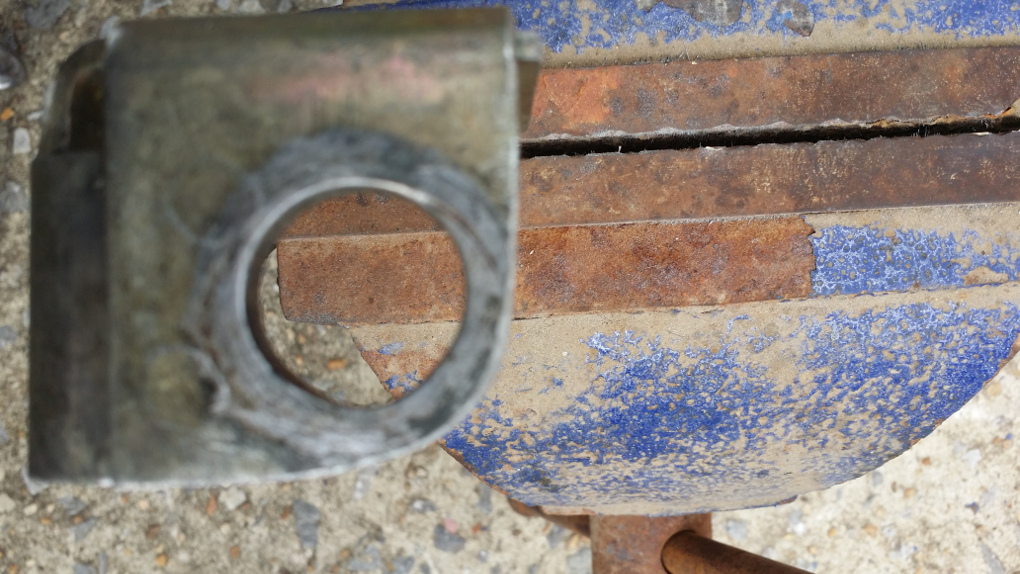
Next I cleaned up the steel pieces. I did this using a pocket knife and Fast Orange hand cleaner. I used the Fast Orange for 2 reasons. 1, it was conveniently located by the sink and actually did a good job. 2, as I was working on the parts in the house, Fast Orange doesn't have an order that my wife finds offensive. Here are a couple of pics of clean and uncleaned parts: (Sorry my hands shake and the pics are a little blurred but you can see the difference.)

I had to fit the new bushings to the steel pieces as the center hole was just barely too small.
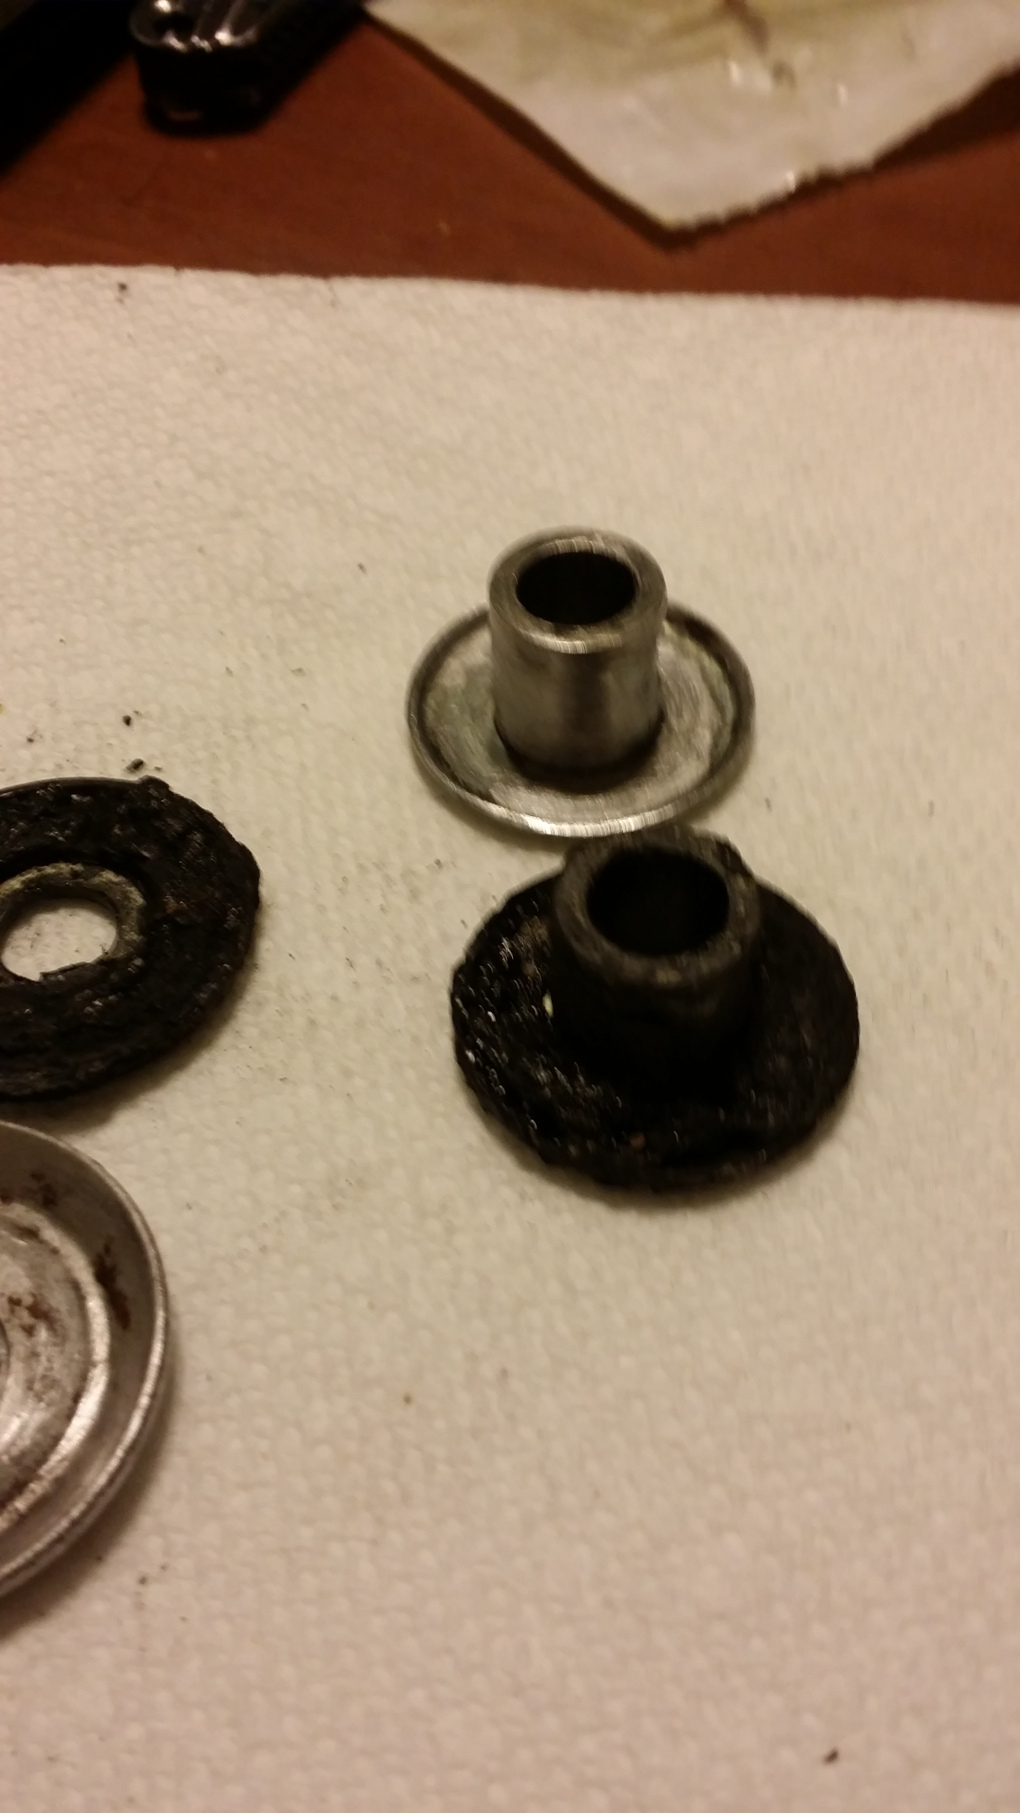
I used my electric drill to make the hole the right size by wrapping sandpaper around a drill bit and forcing it through the hole while turning. I was careful and manged not to injure myself which was better than I had expected as part of the time I was holding the bushing in my bare hand. (I would suggest a pair of heavy gloves to protect your hands.) Wrapping the bushing with rubber electrical tape was helpful for holding on to it with my hands and for protecting the bronze then I clamped onto it with piers. Fitted the pieces look like this:
The new bushings being non compressible changed the alignment for the belt pulley. So I put a 5/8 inch washer in as a spacer between the pulley and the fan on the new alternator and the belt alignment seems to be good.
The upper bracket had to be modified in 2 ways to fit the new alternator. The squared corner had to be rounded off so that the alternator could swing to tighten the belt (the squared edge hit the outer case and prevented the alternator form moving). It now looks like this: (focal plane is wrong but you can see what I mean)
With the Bushing assembly inserted (this is backwards to the install but gives a good visual) It is actually the correct orientation for mounting as this is the back half of the Top Bracket , for some reason I was think it was the front half but that never came out of the car. Sorry! It is actually the correct orientation for mounting as this is the back half of the Top Bracket , for some reason I was think it was the front half but that never came out of the car. Sorry!

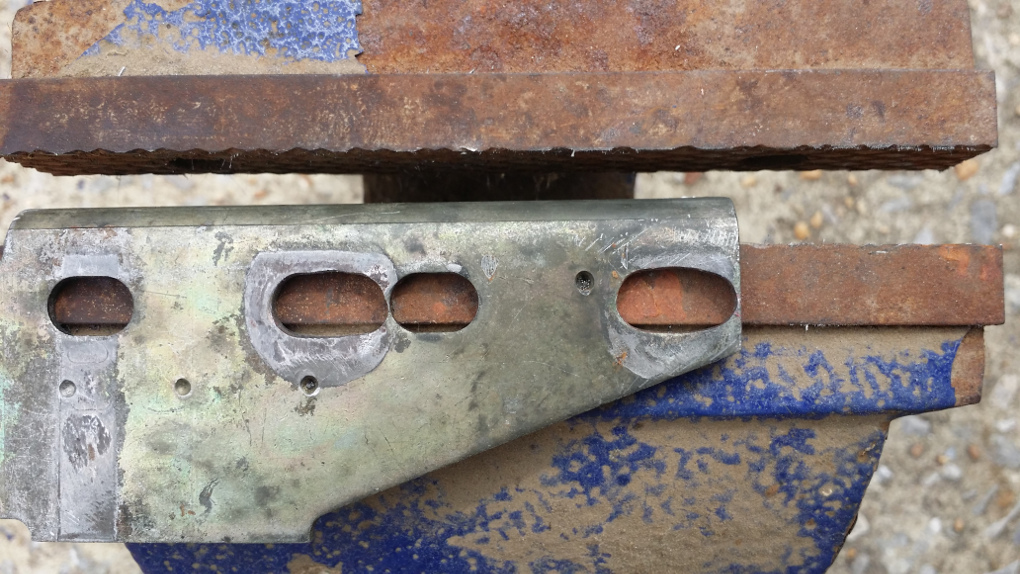
And, the side mounting holes needed to be elongated so that the bracket could be moved forward to provide the pinch needed to hold the alternator in place. Here are the elongated holes:
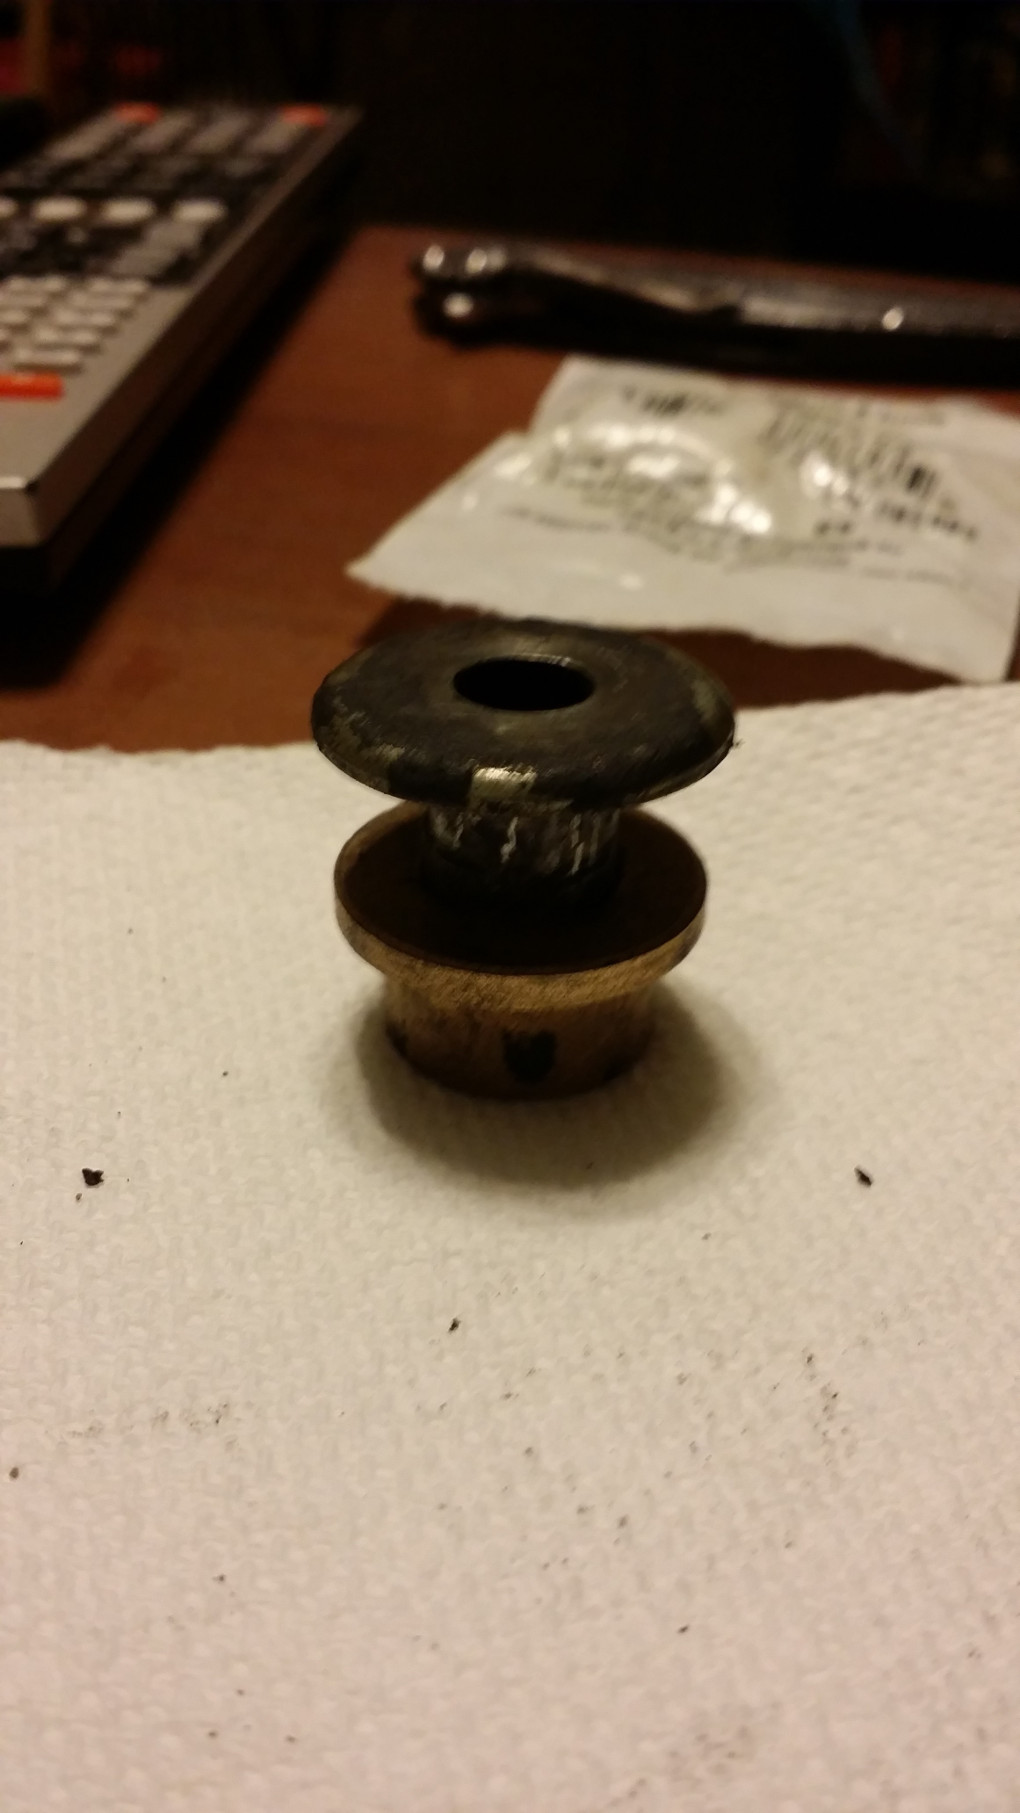
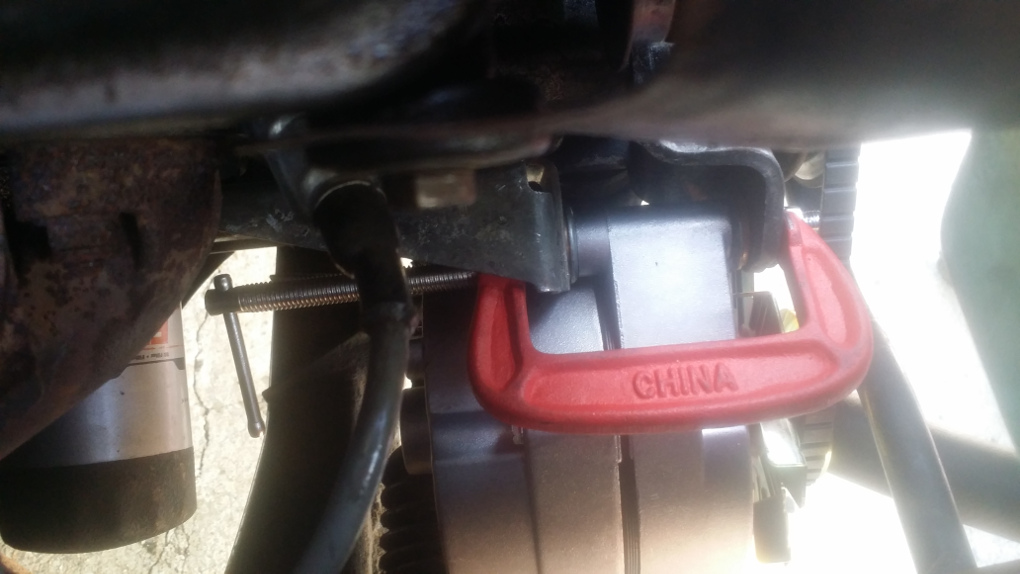
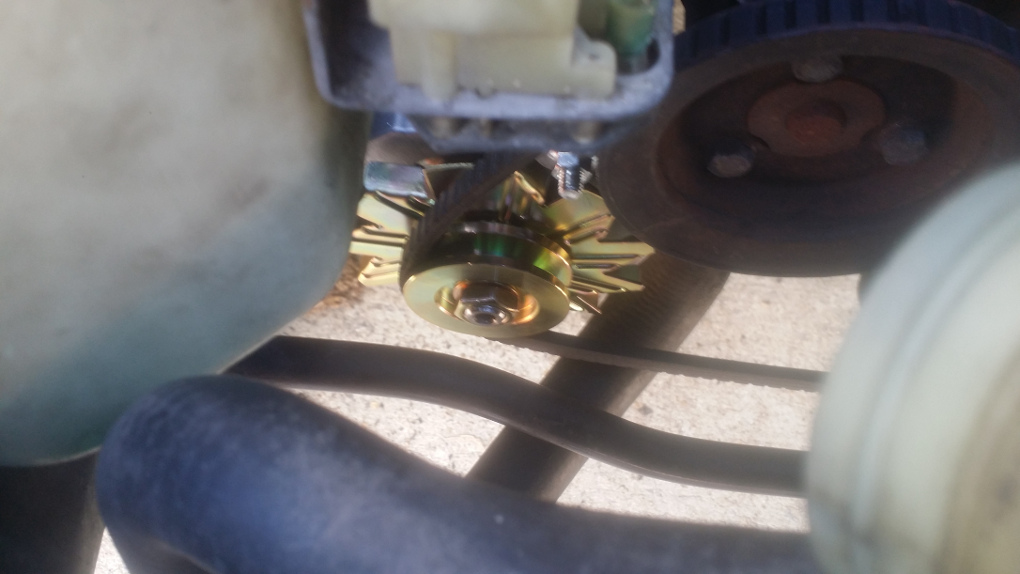
I used a C-clamp to squeeze the mounts together and establish the right spacing. I left the clamp in place until I had tightened both the bolts on the rear bracket thus assuring there would be no wobble due to excess space between the bushings. Of course both sets have the bushing shoulder side inside the brackets and against the alternator. As you can see here:
Also I put a piece of copper tubing into the alternator to make it fit tighter around the mounting bolt. 3/8 inch outer diameter is probably the right choice but at Lowe's that was only available as a coil with way more than I needed. So I bought a 1 foot section of that was labeled 1/4 soft copper. It just slides over the bolt and just slides through the alternator hole so it is not tight but takes up most of the space. I ended up flaring one end to create enough friction that it would not drop out of the alternator as I was trying to get it into place. I put the flared end towards the back and you can see that is also the direction I put the bolt through the alternator so I didn't have a problem with the bolt catching on the edge of the tubing while trying to feed it through the alternator.
I will cover the lower bracket in the next post.[/img]
_________________
Always be yourself, unless you can be Cthulhu, then always be Cthulhu.
Last edited by Sensei Grant on Sat Jun 11, 2016 12:03 am; edited 1 time in total |
|
| Back to top |
|
|
Sensei Grant
Joined: 17 Apr 2016
Posts: 11
Location: Tuscaloosa, AL
|
| Posted: Fri Jun 10, 2016 12:21 pm Post subject: Part 4 Lower bracket |
|
|
I think I have the sizing fixed so you can ignore this first part.
First, sorry for the size of the pictures in the previous post. I did not realize they would be so big and make the whole thing difficult to read. I don't know an easy way to make them display smaller in this forum so the pics in this portion will also be large.
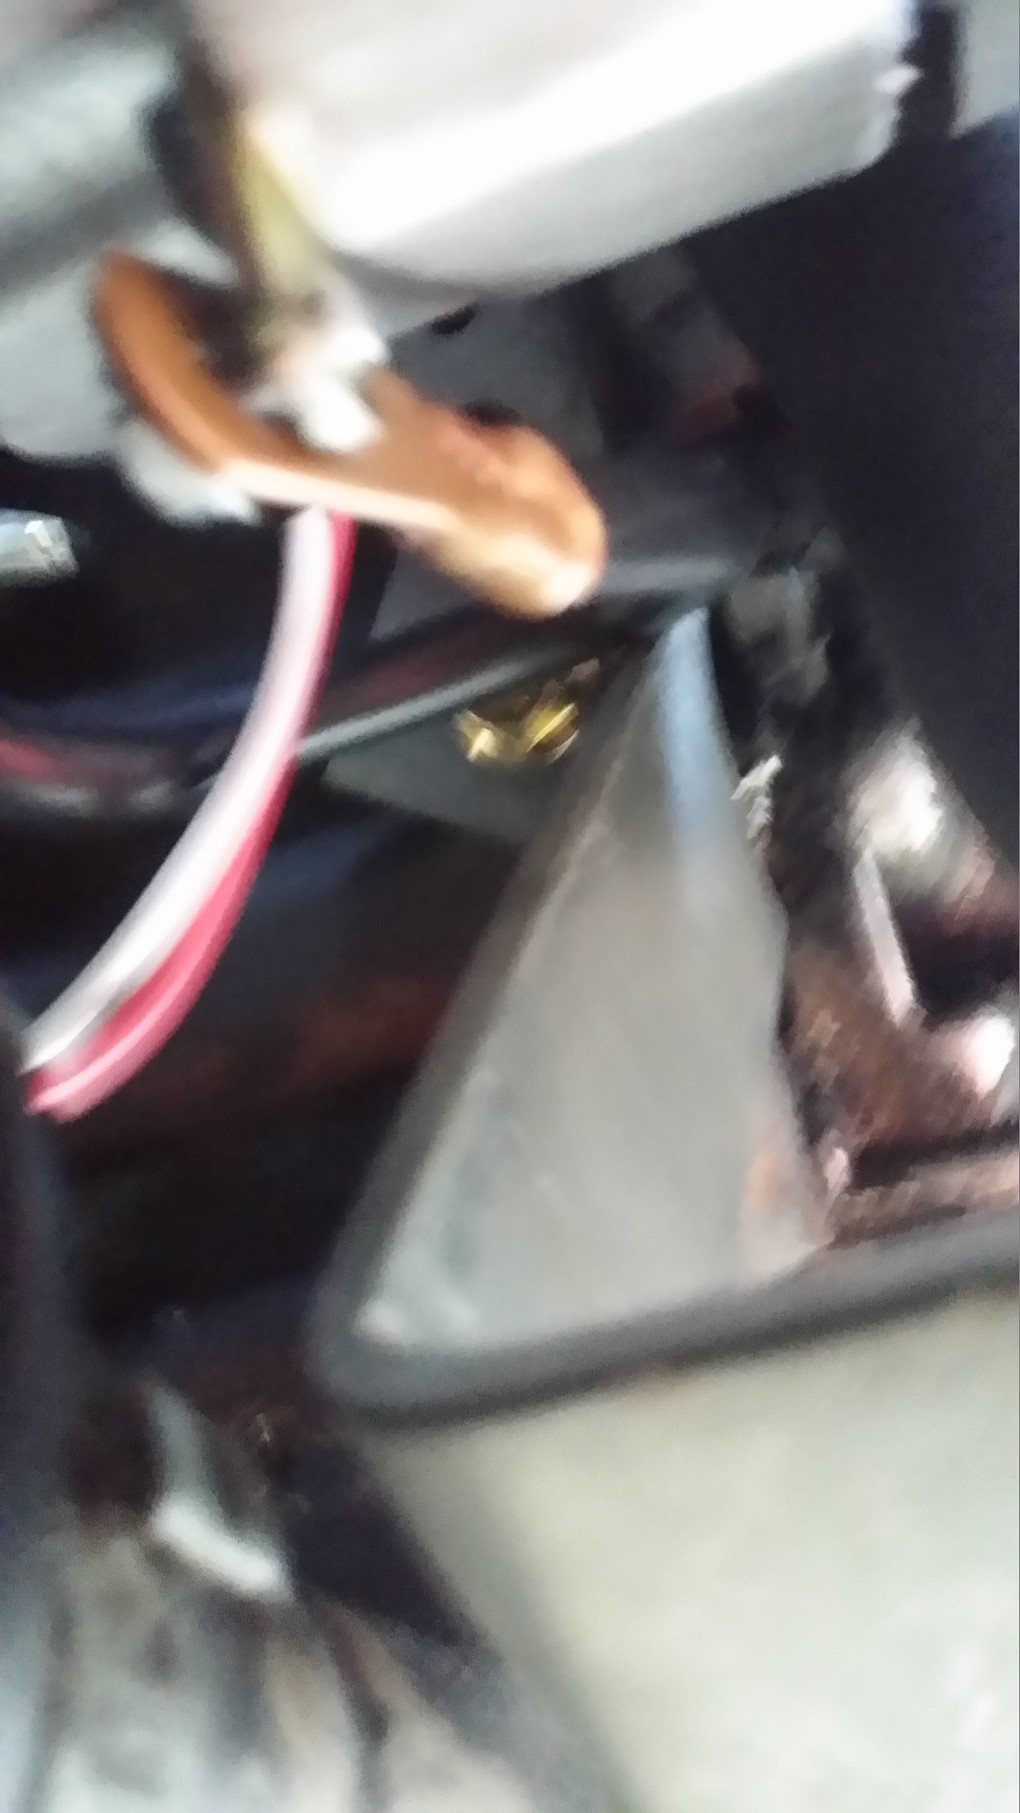
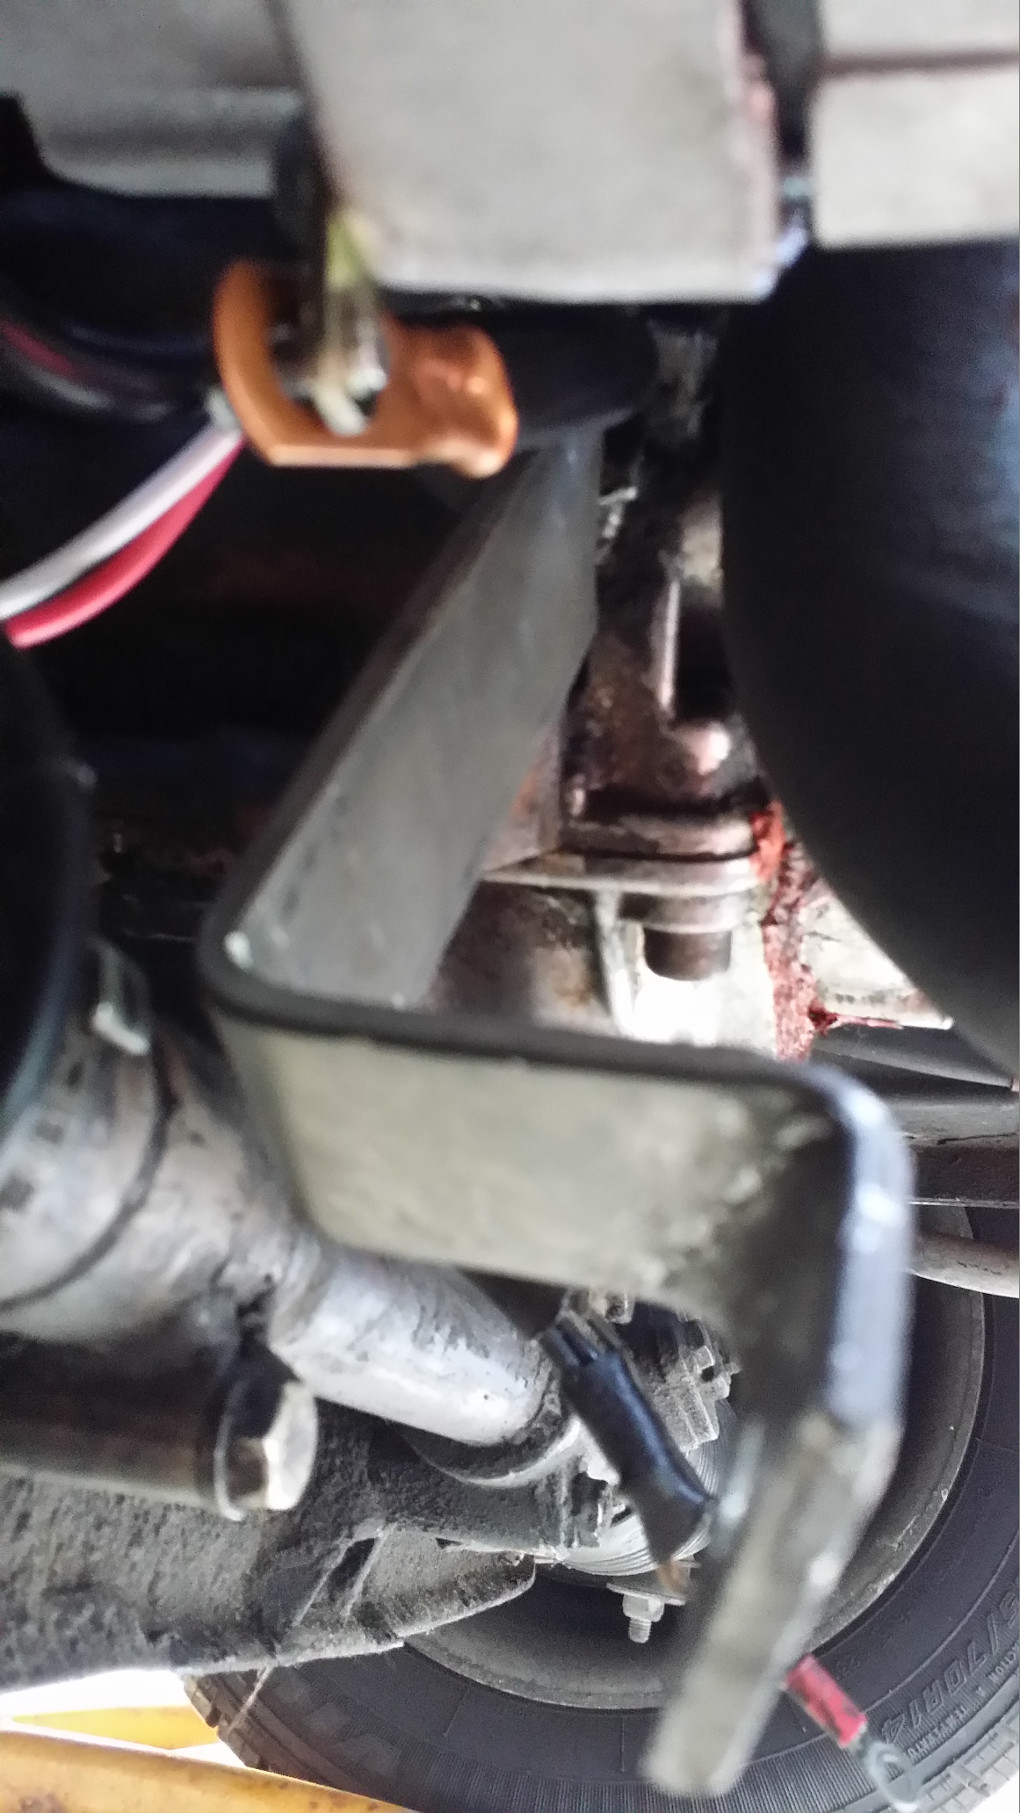
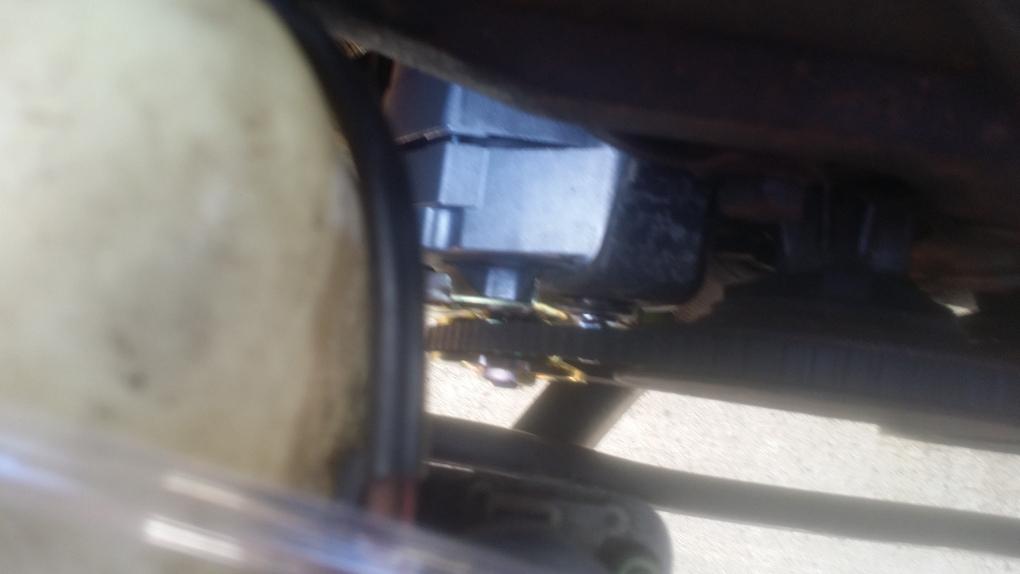
The lower bracket was a bigger job than the upper bracket. The original rubber block had been replaced with a single stud about 3 inches long. 2 large fender washers and a steel shoulder bushing had been used to approximate the rubber mount. The tension bracket was mounted to the end of the stud (both the broken original and my replacement). I took all of this junk out and fabricated a new 2 piece lower bracket. It was late and I was tired so I forgot to take a pic of the upper part before I put it in the car. As it was a bit of a pain to get it in place (and I was tired so I wasn't going to do it again) I only have pics of it in the car and because of its location and shape I could not get a good pic showing the entire bracket. It is in essence an S with a tail but the top and bottom are at angles to get a flat surface on the block and then another flat surface facing the front of the car. Here is the top where it is bolted to the block. (a little out of focus) The electrical connection is the ground wire from the alternator to the block and it is still loose so that it can move when I tighten the belt, the wire is obscuring the the top half of the bolt holding the bracket to the block.
Here is the bottom where the other piece will attach. I had to make sure I had enough clearance for the lower radiator hose which is right in front of this bracket.
The second part is the adjust portion. As the flat stock I was using is wider than the original bracket, the slot has to be above the center-line to clear the alternator housing. The rounded end has a hole that matches the hole on the end of the top bracket. It mounts to the back side of the top bracket so the rounding allows it to pivot without binding on the top bracket. Here is a side view:
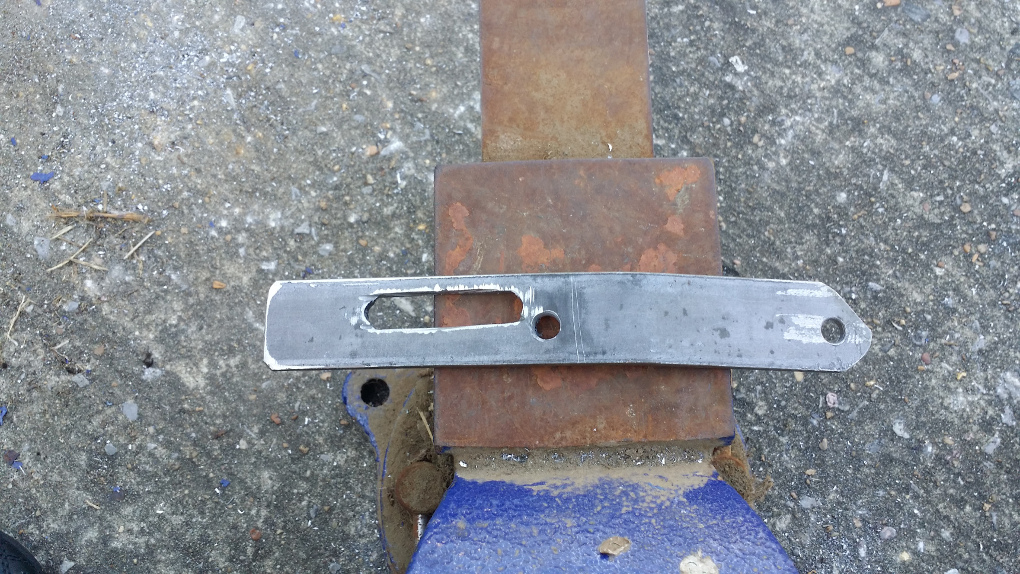
The hole below the slot was supposed to be the start of the tension slot; however, when I made my alignment bend to get the tension section to be in the same plane as the alternator, I bent it in the wrong direction. As I was working the metal cold and with what might be called primitive tools (a 3 lb hammer and the vice you see in the photos and the vice is just sitting on the driveway being held in place only by the pressure of my foot), I simply flipped the bracket over and put the slot on the other side of the center line rather than trying to bend it back the other way. I had plenty of adjustment room and can even slip the belt on by hand with a little effort. I could not force a belt on with the old system, instead I had to cheat and get it on all but the lower half of the crankshaft pulley and then bump the starter to force belt to walk into the groove.
Here is the angle that gave me the proper alignment: (the slot is in the longer section)
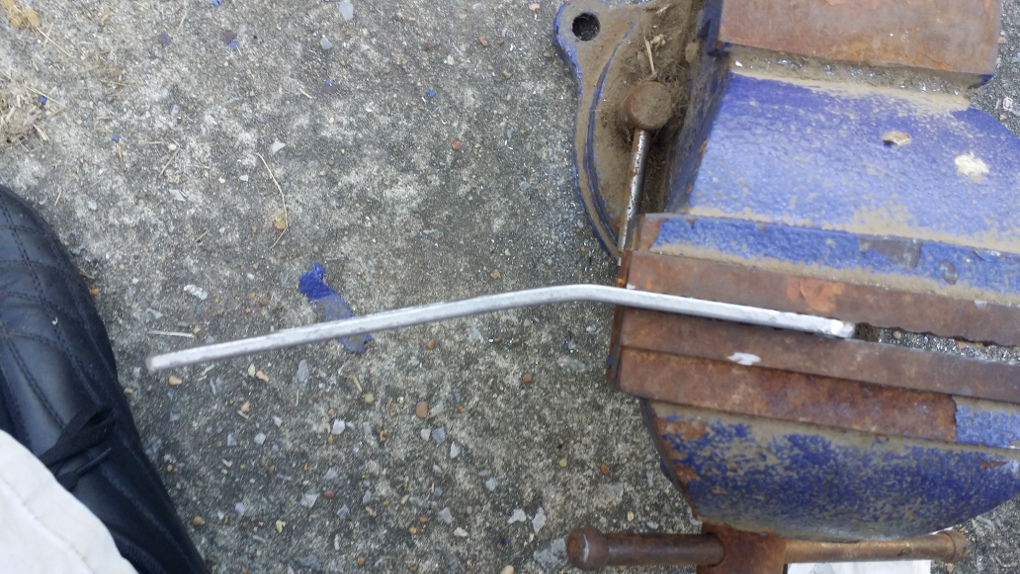
Finally, I needed a washer between my bolt and the slot but the washer I had was too wide so I cut it to give the clearance I needed.

Here it is in the car (the belt has not been tightened yet):
Here is another pic showing the belt alignment after adding the 5/8 inch washer as a spacer behind the pulley: (it may still be a hair too far back but it is very close. I will have to run it for a few miles to be able to tell if I get uneven wear)
I ran 4 gauge wire from the battery to the alternator and that would have been all I needed as this is a single wire capable alternator and all the mounts are now metal; however, I also bought a pig tail and and connected the dash warning light. Also in an effort to address other issues I replaced the battery ground cable with a larger 2 gauge wire and added a 4 gauge wire from that same connection to the block. On the block I ran another 4 gauge wire from the same connection to the grounding tab on the alternator. Overkill on the alternator grounding but I had the wire so I used it. 4 gauge back to the positive of the battery was the manufacture's recommend size.
There was no easy way to modify the cool air housing for the back of the new alternator so right now it is pulling any air that is available. I will try to find a solution that will allow me to duct cool air to the back of the alternator so the heat form the exhaust doesn't overheat it but that project will have to wait at least a few days.
Here is the voltage meter with the car at idle:
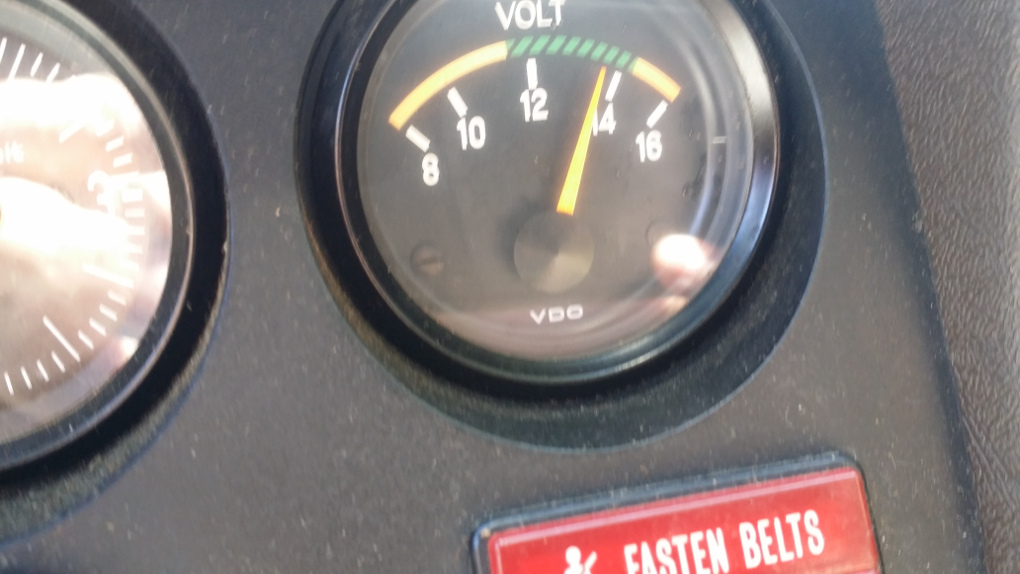
I never got this level out of the other alternator even at higher RPMs. I still have wiring issues to address. The voltage meter reads just less than 14 volts but my multi meter reads 14.4 at the battery. That difference is not a big issue; however, when I turn on the lights the volt meter drops to about 12.5 yet my multi meter still reads 14.4 at the battery. That difference seems a little bit too large so I will be under the dash looking for other electrical problems.
As I said in an earlier post, the overheating issue has resolved itself (at least for now) I have been driving in town and it has been getting hotter by the day but the temp gauge just passes the 1/2 mark and the fan kicks on and the temp drops back to just below the 1/4 mark also the temp gauge is not bouncing nearly as much as it was. It had been jumping by nearly 1/4 and now when it bounces it is more like 1/16. On the other hand, the cigarette lighter still doesn't have enough power to charge my phone, the oil pressure gauge is jumping around by 2 to 4 bar, and the voltage meter moves with the turn signals so I still have work to do.
I hope these post were helpful and enjoyable and I want to say thanks to the people who have taken the time to look at them.
_________________
Always be yourself, unless you can be Cthulhu, then always be Cthulhu.
Last edited by Sensei Grant on Sat Jun 11, 2016 12:26 am; edited 1 time in total |
|
| Back to top |
|
|
XLR8
Joined: 30 Mar 2016
Posts: 150
Location: Byron Bay, Australia
|
| Posted: Fri Jun 10, 2016 5:17 pm Post subject: |
|
|
Interested very much in this thread, but those photos are WAAY too BIG. Mods or anyone, what's the code that Sensei could add to the images to get them a more reasonable size?
I suspect your fans are now working. Maybe that helps the over heating issue?
_________________
'81 Porsche 924 NA
'89 Eunos Roadster NA6
'06 Landcruiser HDJ100 |
|
| Back to top |
|
|
Sensei Grant
Joined: 17 Apr 2016
Posts: 11
Location: Tuscaloosa, AL
|
| Posted: Sat Jun 11, 2016 12:13 am Post subject: Pics resized. |
|
|
Sorry for the picture sizing issue. On the other forums I use, it seems that the pics are automatically resized for screen resolution. I have resized all the pics and it now displays properly for me. I also corrected an error and added the details for sleeving the upper mount bolt.
_________________
Always be yourself, unless you can be Cthulhu, then always be Cthulhu. |
|
| Back to top |
|
|
brian19600
Joined: 28 Oct 2013
Posts: 375
Location: NJ/CT
|
| Posted: Sat Jun 11, 2016 7:49 am Post subject: |
|
|
Cleaning up your under dash grounds might help a lot of the problems.
_________________
78 924 |
|
| Back to top |
|
|
Sensei Grant
Joined: 17 Apr 2016
Posts: 11
Location: Tuscaloosa, AL
|
| Posted: Sat Jun 11, 2016 2:01 pm Post subject: |
|
|
Cleaning the underdash grounds is next on my list now that I know the alternator is functioning. Any suggestions/advice from those with experience are appreciated.
_________________
Always be yourself, unless you can be Cthulhu, then always be Cthulhu. |
|
| Back to top |
|
|
XLR8
Joined: 30 Mar 2016
Posts: 150
Location: Byron Bay, Australia
|
| Posted: Sat Jun 11, 2016 3:21 pm Post subject: |
|
|
Thanks for the photo resize. I love this mod.
_________________
'81 Porsche 924 NA
'89 Eunos Roadster NA6
'06 Landcruiser HDJ100 |
|
| Back to top |
|
|
brian19600
Joined: 28 Oct 2013
Posts: 375
Location: NJ/CT
|
| Posted: Sat Jun 11, 2016 8:59 pm Post subject: |
|
|
When I did mine, the dash was out, so it was easier. If the driver seat is out it will be more comfortable. But getting the seat out can bring it's own problems with spinning nuts in the floor bracket (it seems like nothing is simple on the 924). Either way, you will be learning new yoga positions. 
Mine had lots of corrosion, so I was glad I did it. It was rather surprising since it is way up under the dash. I also unplugged the harnesses from the back of the fuse panel and cleaned corrosion off all some terminals on the panel. Where ever I worked on the electrical I used some electrical grease. Unplugging the harnesses may give better access to the ground "crown"too, I'm not sure.
_________________
78 924 |
|
| Back to top |
|
|
Glemon
Joined: 05 Jan 2016
Posts: 267
Location: Lincoln, NE
|
| Posted: Sun Jun 26, 2016 1:54 am Post subject: |
|
|
Nice write up on the alternator. I have read about cleaning the grounds under the dash too, and it has been on my to do list for some time. Took me about three tries to even see it, and a couple more tries at access after finding have convinced me there is no way I can get it done withouthis disconnecting a few wires and getting them out of the way.
_________________
88 924S
68 TR250
02 IS300 |
|
| Back to top |
|
|
|
|
You cannot post new topics in this forum
You cannot reply to topics in this forum
You cannot edit your posts in this forum
You cannot delete your posts in this forum
You cannot vote in polls in this forum
|
Powered by phpBB © 2001, 2005 phpBB Group
|

