| View previous topic :: View next topic |
| Author |
Message |
CorsePerVita

Joined: 25 Jul 2008
Posts: 1992
Location: Redmond, Oregon
|
 Posted: Wed Sep 22, 2010 8:57 am Post subject: Got bored today... so... CF tutorial! Posted: Wed Sep 22, 2010 8:57 am Post subject: Got bored today... so... CF tutorial! |
 |
|
Figured I'd post up a brief introduction to carbon fiber. I've got a lot of emails about it since I made the dash and posted it up all over. So I figured I'd make a brief "This is how you..." for those that wish to do it yourself.
It is hard to find ANY tutorials online without paying money. I am a do it yourself type, trial and error... so this is the beginners guide to carbon fiber.
A few things to start off.
- ALWAYS WEAR A MASK. PERIOD. If you value your lungs, wear a mask. Not a cheap mask. Get a high grade mask, the kind you would wear if you were going to paint a car. Some of the fibers that come up from carbon fiber when cutting it are TINY. You do NOT want it in your body.
- ALWAYS WEAR GLOVES. PERIOD. Mostly because this stuff hurts like a pain in the butt if you get it in your hand.
- IT IS EXPENSIVE. A "decent" layered part is at least 4 to 5 layers. One sheet of carbon fiber LOOKS like a lot but think of it like paper... if you put resin over paper it'll be easy to bend and snap. You need MULTIPLE layers to make it worth a damn. Thin parts you can get away with 3. Anything that needs to stand up to force or stress, more... till you're happy with it. 1 yard of carbon fiber goes far but if you're making huge parts, no.
- BE QUICK! Once you mix resin you have a limited window to get things ready!
- KEEP IT SIMPLE - the more intricate the part is the more difficult it will be to make that part in carbon fiber. Curves are one thing, but tiny tips and sharp curves can be hard to mold. Be prepared for lots of prep work for complicated parts.
With that said.... this tutorial is for laying carbon over existing parts. There are several ways to do it. The most expensive but efficient way is to vacuum bag parts (this sucks the CF up to the part and keeps it air tight while it cures), the other is to make a mold out of another substance such as plastic or fiberglass, this is also expensive. The other way is to use an existing part as the mold itself. This can be quite effective but you can risk destroying a part DEPENDING on what it is made out of (like a dash) and can also have difficulty staying flat or holding shape so you must be very careful when using this method.
Step 1... choose a part. In this case I have chosen the heel guards off of my 1999 Ducati 900SS. Then figure out how thick you want the part to be and cut the pieces of carbon fiber to match it's shape.
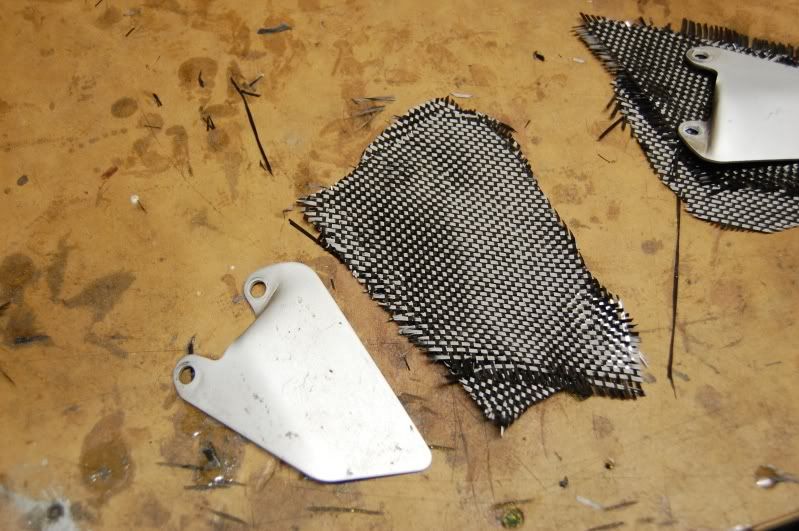
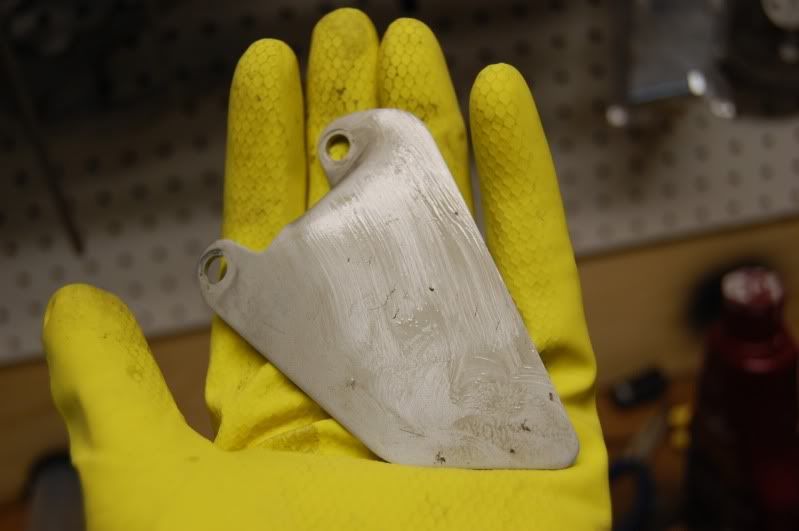
Step 2... cover the part with some sort of wax. This will keep the resin from STICKING to the part. It sucks when it does, believe me.... turtle wax works the best, however, in this case I used meguiars 3 step was (used step 1 cleaner wax).
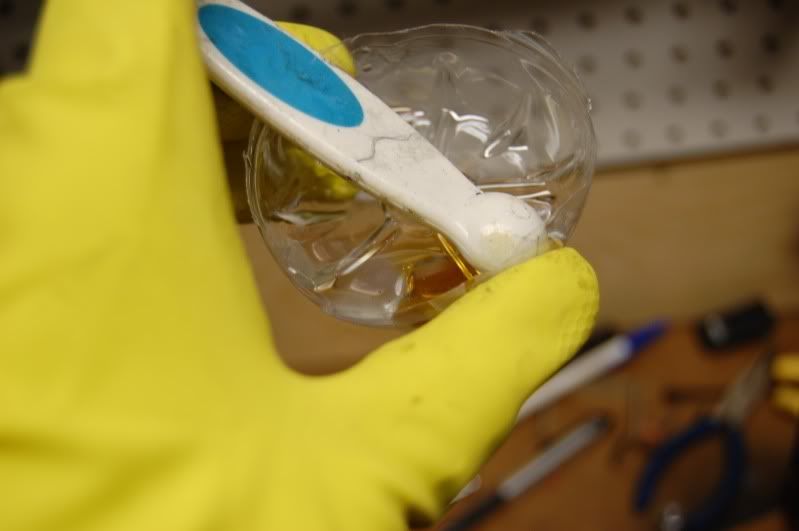
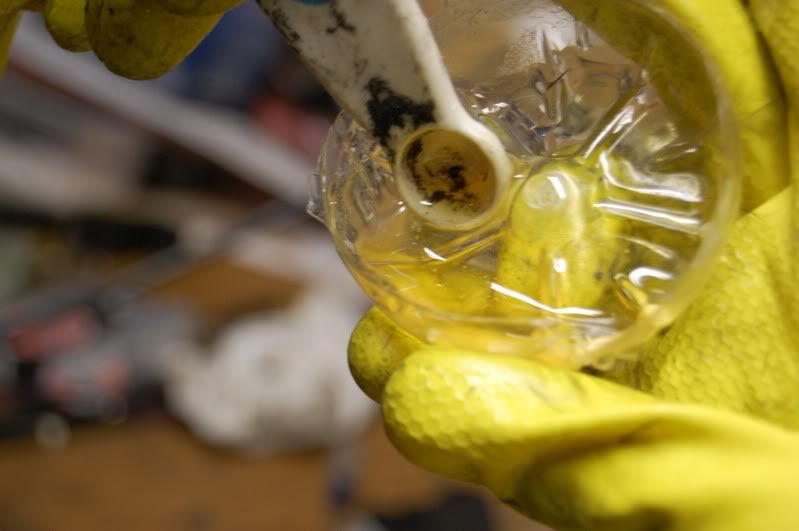
Step 3... Mix the resin - in this case we are using an industry standard resin. The mixture is 4 parts resin to 1 part hardener (or 4 scoops white stuff into 1 scoop of yellow stuff in layments terms). If you mixed it correctly you will likely see some bubbles in the resin. Keep mixing and try and get as many of the bubbles out as possible.
Step 4... Determine how you want to lay the material down. Some people get the carbon wet and then lay it down. I prefer to lay mine over the part and pour the resin on it and pack it with my fingers (sort of like how you would pack a wheel bearing with grease, just mash it down and pat it nicely to get it through all the crevasses)
Step 5... Keep adding layers. Use up that material, lay down more resin, you will notice the thicker it gets the easier it is to keep molding it!
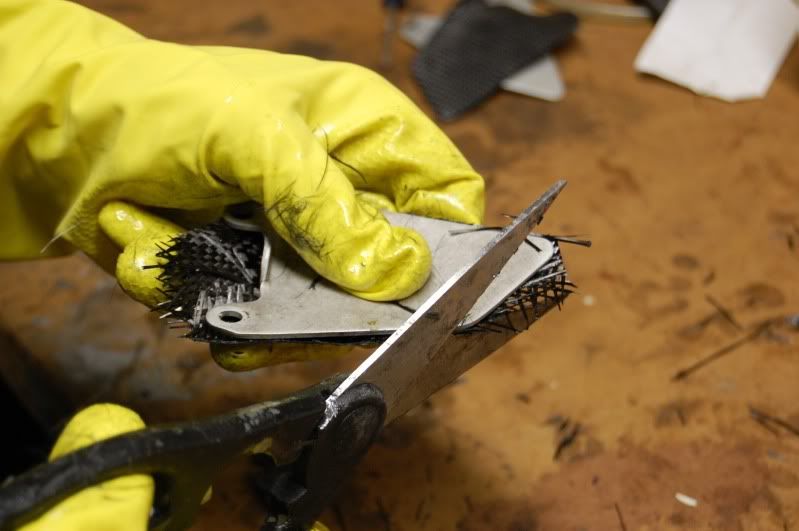
Step 6... Trim off the edges while you still can. Once this stuff hardens, if it is thick enough, about the only way to trim it down is with a dremel or cutting wheel. The dust is so fine at that point that you NEED a mask. I prefer to use a nice sharp pair of scissors to trim the edges. This way you can have a little flexibility in trimming it up and you can end up with a good result, it also is easy to trim while it's still wet!
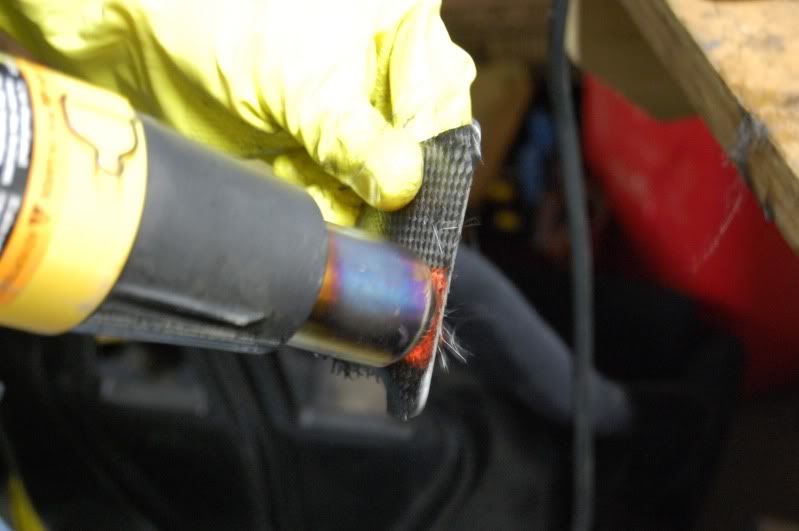
Step 7... With the edges trimmed where you want it, time to cure that puppy! HEAT GUN TIME! Keep in mind, you can SEE and SMELL it cure. When the heat is applied on a heat gun (in this case, a simple $20 heat gun from wagner from your local home depot is PLENTY of heat) it will start to bubble. BE CAREFUL, if you apply too much heat then it will bow in places and not stay flat, try and keep the heat even. The way this stuff cures and takes off it will get HOT, BEWARE, THIS CAN BE A FIRE HAZARD. IT WILL SOMETIMES SMOKE AND IT WILL GET HOT! Keep this in mind on your gloves! Sometimes if the resin "takes off" on your gloves they will get HOT, be careful being burned by resin would not be fun! But be CAREFUL! But again, keep it consistent, once it starts to take off you will lose the ability to mold the carbon fiber, so do not do this till you have it formed exactly how you want it!
Step 8... Wait for the curing to stop, then keep trimming!
Step 9 and 10 are simple..... sand sand sand with 600 grit sandpaper to get the surfaces FLAT. Clean it off with water, wetsand, sand more, more sanding... then when you think you're done, sand more. Step 10 is to lay down your clear coat! You will still need to likely wetsand this as well, I would stick with 600 grit WETSANDING once you get to the clearcoat.
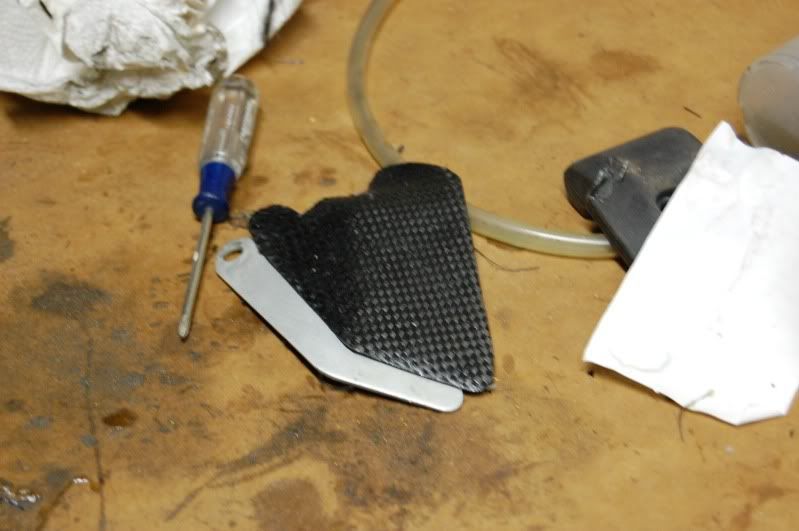
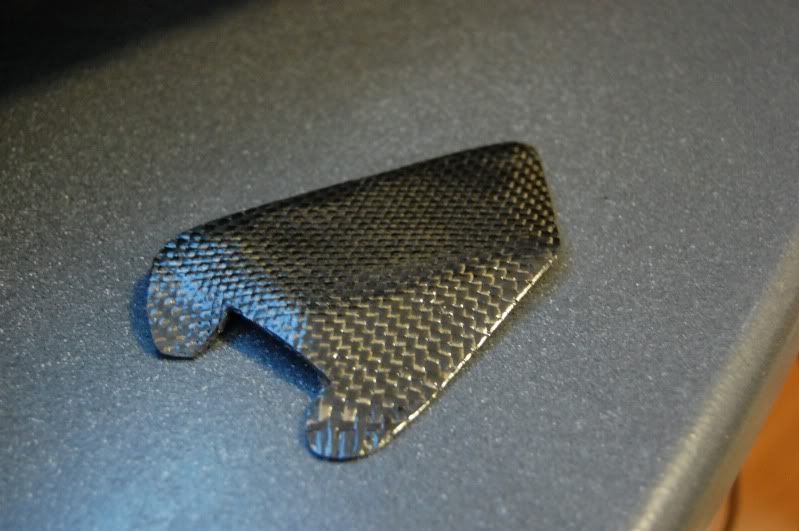
Here is a nearly finished part... this still needs more setsanding and some finishing and some more clear and a bit of touch up.
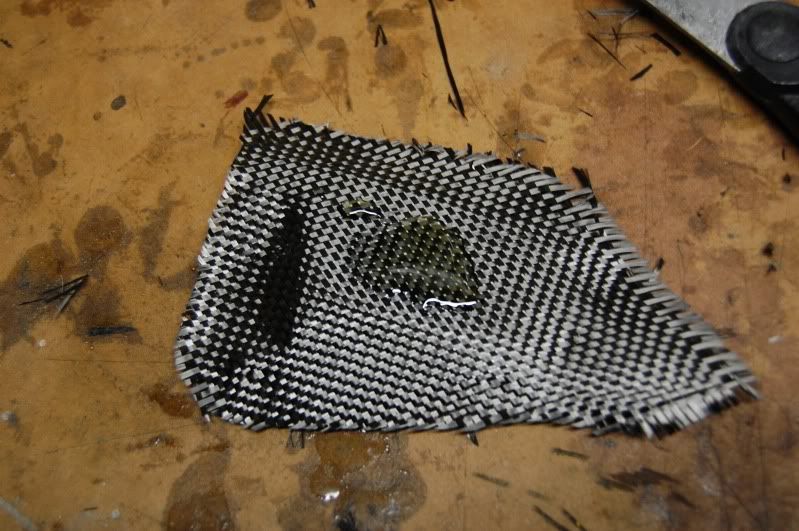
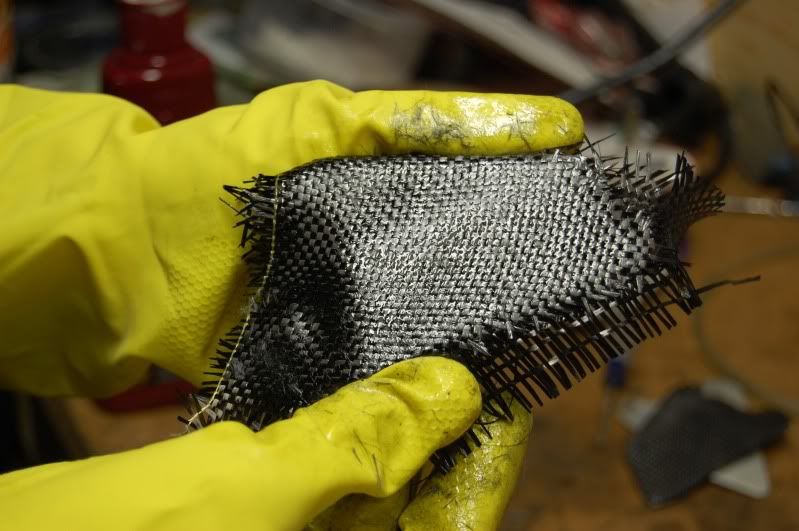
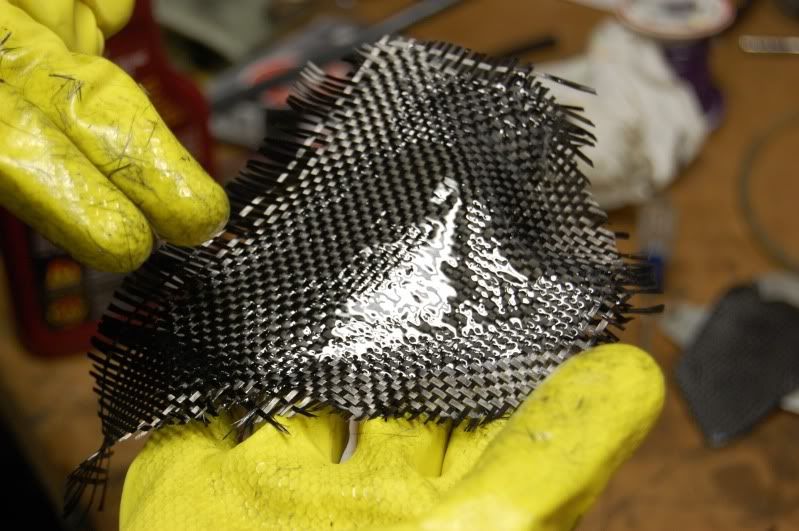
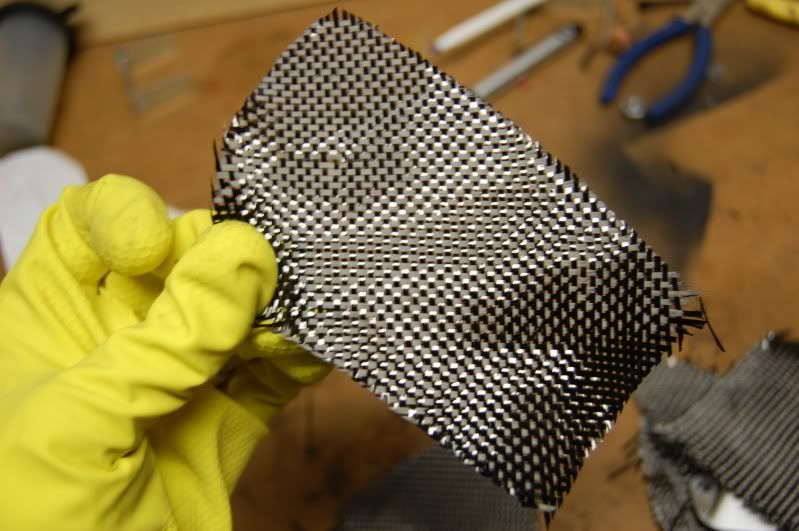
A FEW TIPS!! Carbon fiber has a very interesting feature to it a lot of people forget. It is flexible one way and not another. The rule of laying down a piece that will be structurally SOUND is to lay them down in patterns diagonally. Here is an example:
This is a piece I pulled with my hands sideways, note the middle has a very clear bunching to it, this is because it would not stretch, this is the "non-flexible" point. If it was structurally pulled in this direction it would be VERY STRONG.
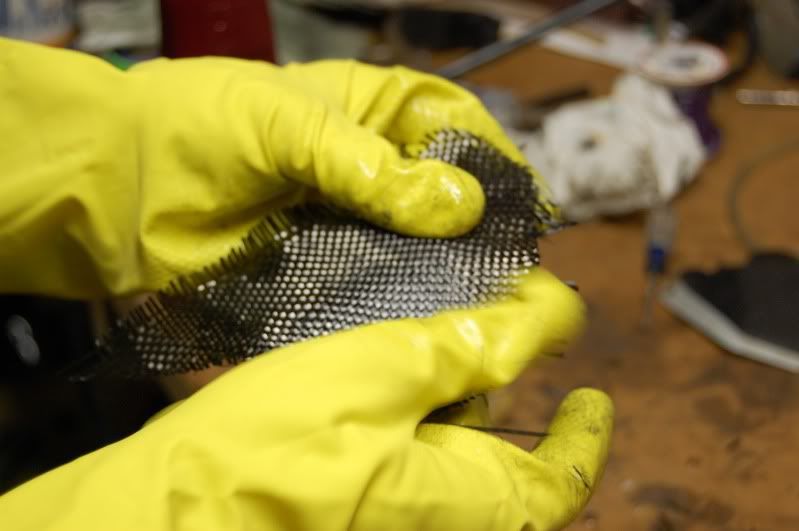
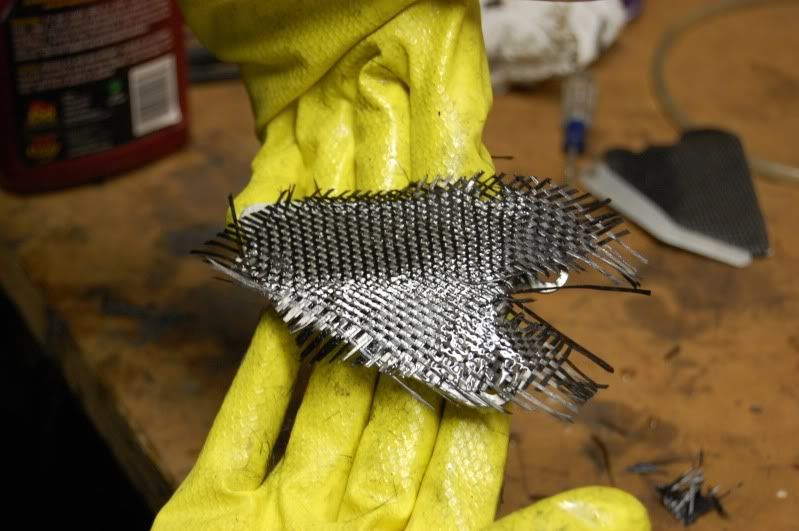
This is the same piece turned and pulled. Note that it has now CHANGED SHAPE. If it was pulled this way... it would stretch!
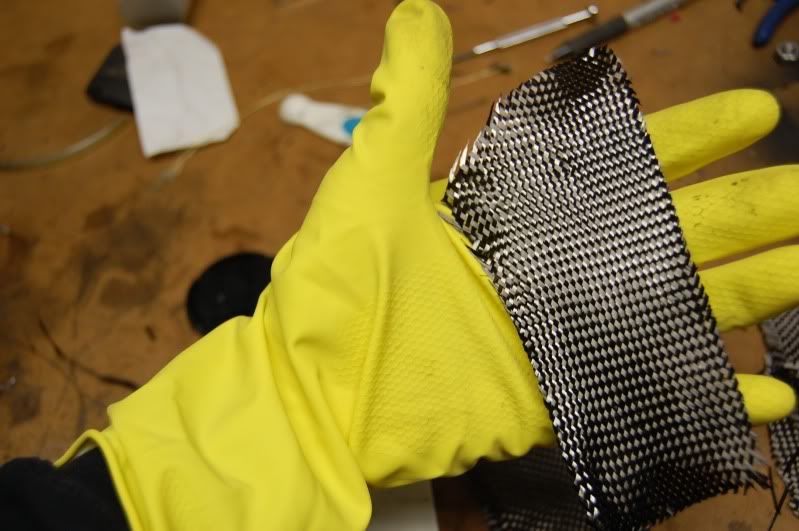
Note how far it stretches!

So the idea if it's going to be structurally strong... lay it down on opposing patterns. The idea is that if you can do that, no matter which direction the part tries to flex, move, bend or pull it will stay strong as can be!
_________________
- 1977 Porsche 924 2.0 N/A (Trackday Project)
- 1979 Porsche 924 2.0 N/A (The other daily)
- 1980 Porsche 931 (Daily)
- 1987 Lamborghini Jalpa
- 1999 Ducati 900SS
Last edited by CorsePerVita on Wed Sep 22, 2010 1:25 pm; edited 2 times in total |
|
| Back to top |
|
 |
tyfighter123

Joined: 19 Jan 2010
Posts: 551
Location: Colorado
|
| Posted: Wed Sep 22, 2010 10:48 am Post subject: |
|
|
awesome thanks for the how to! it looks great. Where do you buy it at?
_________________
Porsche 924 1977 N/A
Mustang GT/CS 2007
Porsche 924S 1987 (parts car)(cut up and recycled)
Porsche 911S 1976
Porsche 931 1980
Porsche 931 1980 (parts car) |
|
| Back to top |
|
|
fiat22turbo

Joined: 18 Jan 2006
Posts: 4040
Location: Portland, OR
|
| Posted: Wed Sep 22, 2010 11:43 am Post subject: |
|
|
ty, try aircraft spruce....
I agree, that's an awesome write-up.
You should have it moved to the How-To section.
_________________
Stefan
1979 924 Carrera GTS (clone-ish)
1988 944 Turbo S (Silver Rose) |
|
| Back to top |
|
|
CorsePerVita
Joined: 25 Jul 2008
Posts: 1992
Location: Redmond, Oregon
|
| Posted: Wed Sep 22, 2010 12:33 pm Post subject: |
|
|
| tyfighter123 wrote: | | awesome thanks for the how to! it looks great. Where do you buy it at? |
there are various stores online, i cannot really specifically give any feedback on them since i don't use them. i have buddies who work in the aircraft industry here who run a business so i get all my stuff from them directly. it's cheaper to buy it local for me since they always have it around.
the cost is roughly around $100-150 a yard.
_________________
- 1977 Porsche 924 2.0 N/A (Trackday Project)
- 1979 Porsche 924 2.0 N/A (The other daily)
- 1980 Porsche 931 (Daily)
- 1987 Lamborghini Jalpa
- 1999 Ducati 900SS |
|
| Back to top |
|
|
924RACR

Joined: 29 Jul 2001
Posts: 9075
Location: Royal Oak, MI, USA
|
| Posted: Wed Sep 22, 2010 8:20 pm Post subject: |
|
|
Fork me that's expensive. I've been getting my raw fabric (for the DSR) from Soller Composites in NH - $20/yd.
Note that it comes in many different weaves. I'm using commercial grade 6K cloth, 6HS harness weave - much much more flexible than the twill pictured.
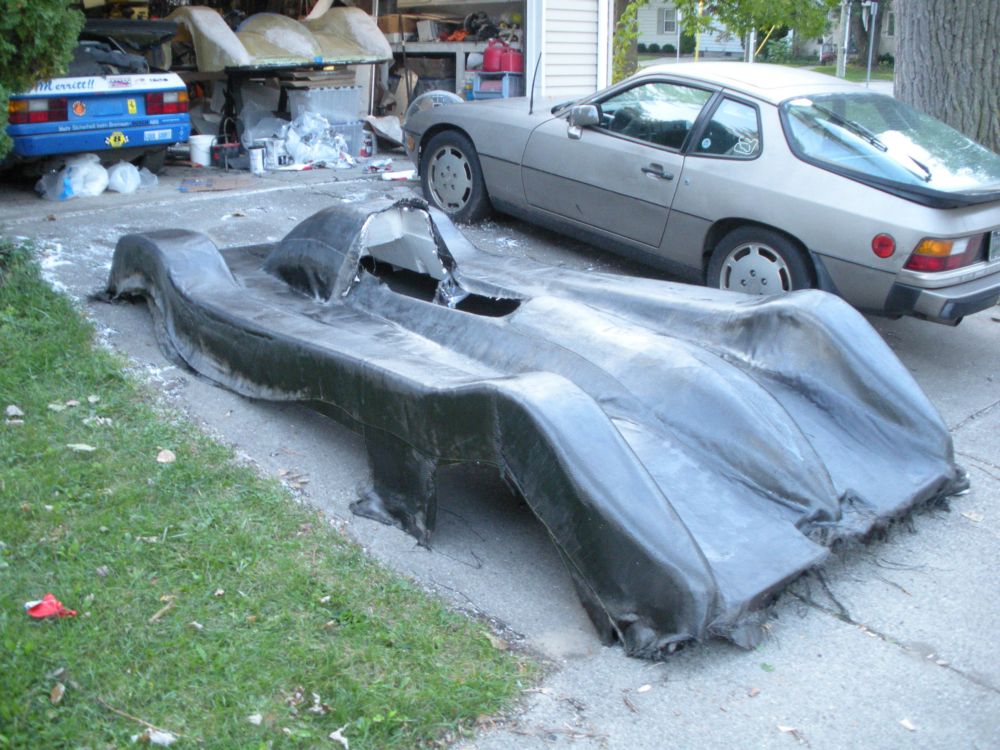
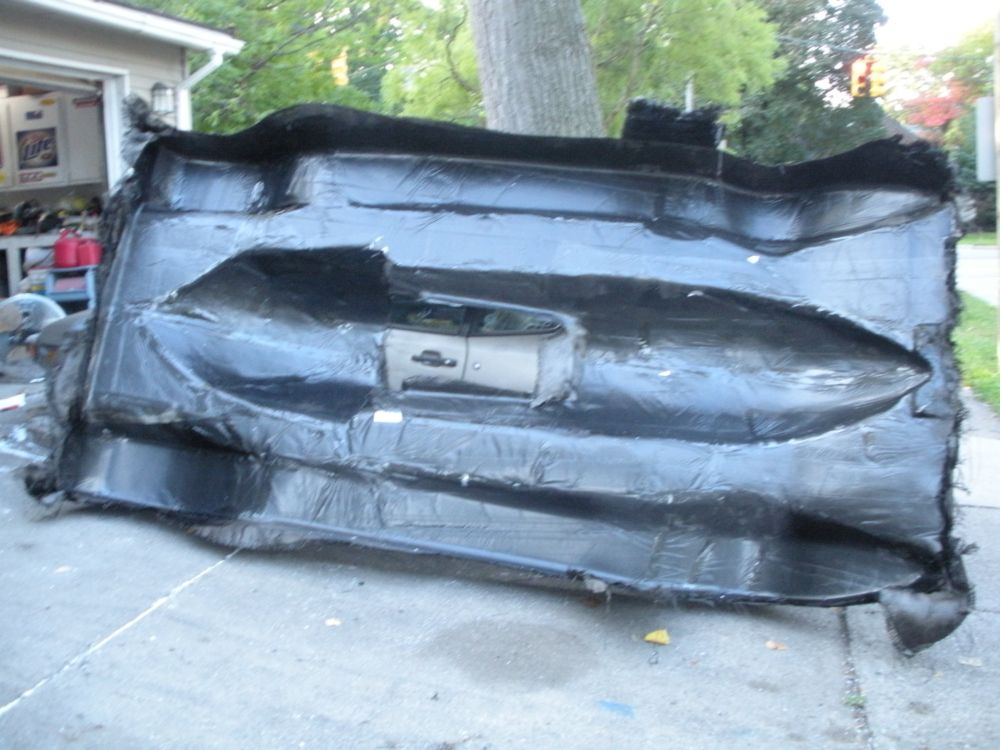
Many different epoxies too... we're using one with a cure time between 24-48 hrs, since we make very large parts, no chance to cure with heat (except cranking the heat in the garage) and need a very long working time. When we laid up this body, it took about 2 hrs to fix everything - 2 layers of material.

Some more pics of the raw part:
All the build pics can be found here:
http://vaughanscott.com/DSR/index.htm
I have about $2k into the carbon (50 yards), epoxy, and supplies now.
We've been using some very different molding techniques; mind you, we are creating stuff from scratch. Plug built with plywood, styrofoam, tape, and older incomplete fiberglass bucks. We used 3 mil dropcloth and mylar duct tape to cover the mold and get a release. Not as pretty as wax, but we didn't have a good part to work from.
(Nice post, BTW!)
_________________
Vaughan Scott
Webmeister
'79 924 #77 SCCA H Prod racecar
'82 931 Plat. Silver
#25 Hidari Firefly P2 sports prototype |
|
| Back to top |
|
|
lo41 black 924

Joined: 05 Apr 2010
Posts: 66
Location: london
|
| Posted: Wed Sep 22, 2010 9:38 pm Post subject: |
|
|
Wow man amazing! This is what i want my dash overlay to be made from.
Really interesting research |
|
| Back to top |
|
|
Grenadiers
Joined: 20 Feb 2007
Posts: 3222
Location: Nelson, WI & Prescott, AZ
|
| Posted: Wed Sep 22, 2010 10:07 pm Post subject: |
|
|
Batman Returns, again!

_________________
'83 944 Track car.
'88 924S Track car.
'89 944 Turbo
2004 Winnebago Vectra monster RV
2012 Jeep Wrangler
2014 Kia Soul
2001 Ford F350 powerstroke |
|
| Back to top |
|
|
924RACR
Joined: 29 Jul 2001
Posts: 9075
Location: Royal Oak, MI, USA
|
| Posted: Wed Sep 22, 2010 10:43 pm Post subject: |
|
|
No kidding... you're not the first to notice a resemblance...
_________________
Vaughan Scott
Webmeister
'79 924 #77 SCCA H Prod racecar
'82 931 Plat. Silver
#25 Hidari Firefly P2 sports prototype |
|
| Back to top |
|
|
CorsePerVita
Joined: 25 Jul 2008
Posts: 1992
Location: Redmond, Oregon
|
| Posted: Thu Sep 23, 2010 1:00 am Post subject: |
|
|
924racr - very cool share, i love seeing stuff like that. thank you for sharing!
_________________
- 1977 Porsche 924 2.0 N/A (Trackday Project)
- 1979 Porsche 924 2.0 N/A (The other daily)
- 1980 Porsche 931 (Daily)
- 1987 Lamborghini Jalpa
- 1999 Ducati 900SS |
|
| Back to top |
|
|
Joes924Racer

Joined: 03 Nov 2002
Posts: 11964
Location: Oregon, Denver Colorado native!
|
| Posted: Thu Sep 23, 2010 2:01 am Post subject: |
|
|
Lets party... Nice job Mr. Scott..& Cors.
Arent we all proud puppies. Cheers.
_________________
1979 porsche 924 Na
1980 porsche Turbo 931GT Replica
Have u ever driven a turbo. |
|
| Back to top |
|
|
tyfighter123
Joined: 19 Jan 2010
Posts: 551
Location: Colorado
|
| Posted: Thu Sep 23, 2010 2:40 am Post subject: |
|
|
Thanks for the info guys, How much does that body weigh?
_________________
Porsche 924 1977 N/A
Mustang GT/CS 2007
Porsche 924S 1987 (parts car)(cut up and recycled)
Porsche 911S 1976
Porsche 931 1980
Porsche 931 1980 (parts car) |
|
| Back to top |
|
|
924RACR
Joined: 29 Jul 2001
Posts: 9075
Location: Royal Oak, MI, USA
|
| Posted: Thu Sep 23, 2010 6:11 am Post subject: |
|
|
Estimated weight is 45lbs.
_________________
Vaughan Scott
Webmeister
'79 924 #77 SCCA H Prod racecar
'82 931 Plat. Silver
#25 Hidari Firefly P2 sports prototype |
|
| Back to top |
|
|
Joes924Racer
Joined: 03 Nov 2002
Posts: 11964
Location: Oregon, Denver Colorado native!
|
| Posted: Thu Sep 23, 2010 6:24 am Post subject: |
|
|
924racr.. did you where any breathing protection
during the lay - up ??
_________________
1979 porsche 924 Na
1980 porsche Turbo 931GT Replica
Have u ever driven a turbo. |
|
| Back to top |
|
|
RC

Joined: 25 Mar 2007
Posts: 2637
Location: Australia
|
| Posted: Thu Sep 23, 2010 9:44 am Post subject: |
|
|
Great write up & how to.
Thanks. |
|
| Back to top |
|
|
pocketscience

Joined: 23 Apr 2006
Posts: 1650
Location: Sydney, Australia... mate!
|
| Posted: Thu Sep 23, 2010 7:30 pm Post subject: |
|
|
| Quote: | | the other is to make a mold out of another substance such as plastic or fiberglass, this is also expensive |
You could try something like ShapeLock maybe for making a mold... I bought some on a whim, but haven't figured out what to do with it yet (may involve my other hobby involving microcontrollers, robots etc).
G.
_________________
Whoever said you can't buy happiness forgot about Porsche!
81 924 N/A, GTS lights, Saratoga, interior, headers, Integral cam, EFI (sold)
95 993
69 911 |
|
| Back to top |
|
|
|

